


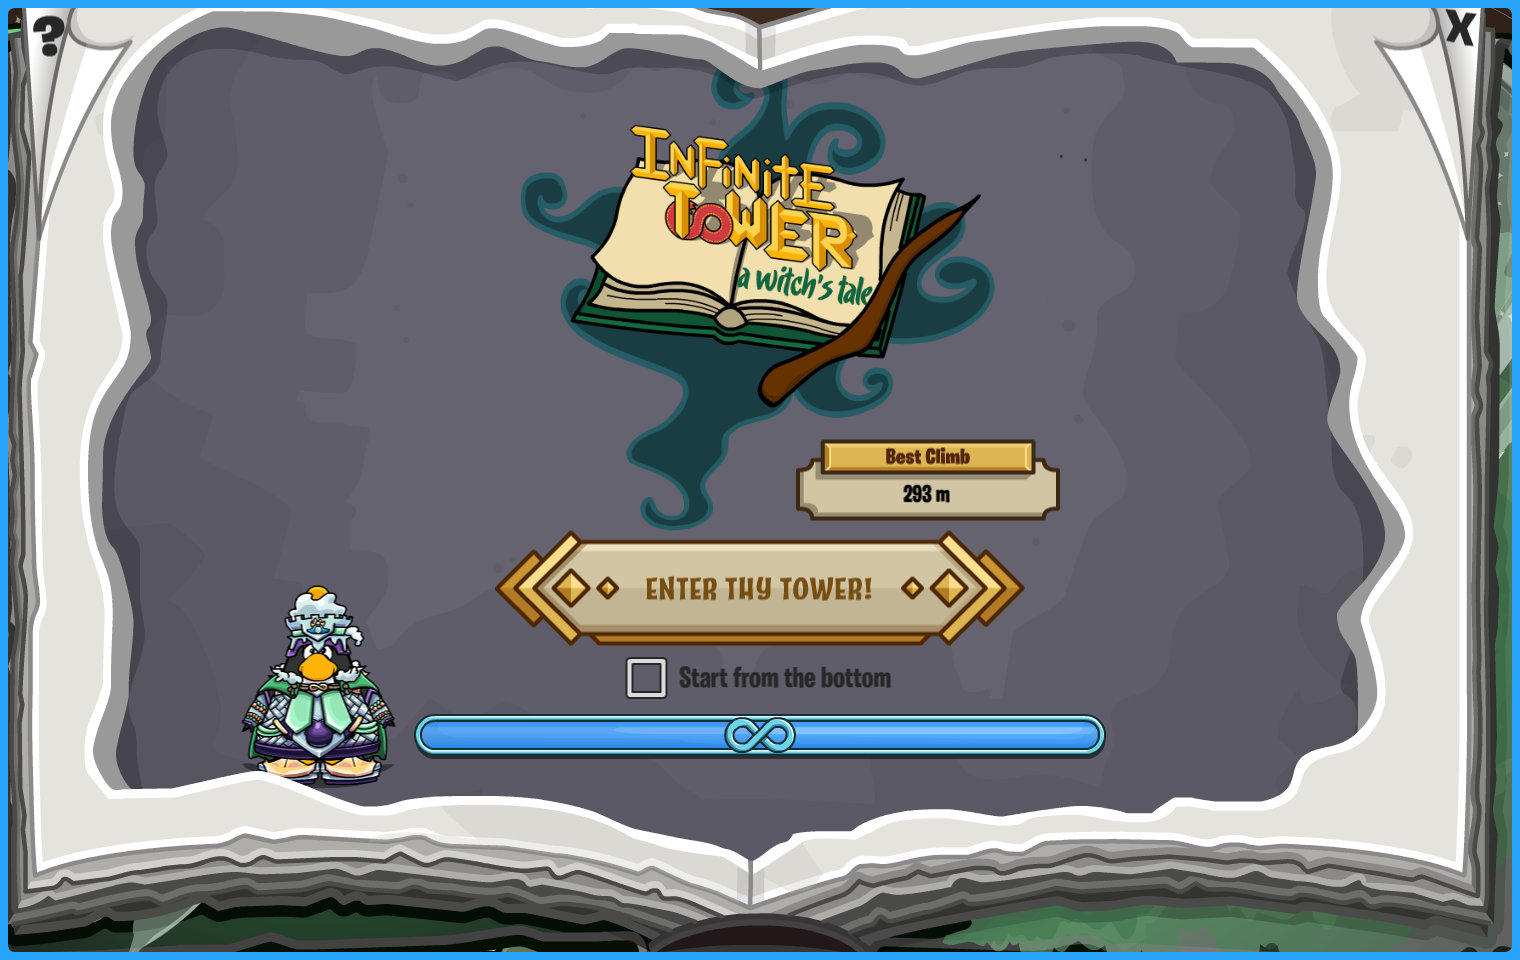
The Infinite wait is over, and the Infinite Tower is here! The end of Club Penguin Journey’s 2025 Medieval Party has officially brought on the introduction of the new permanent mini game – Infinite Tower: A Witch’s Tale. Our Club Penguin News Team has climbed…and climbed and climbed and climbed…in order to bring you this complete Infinite Tower guide so you can breeze through every level and collect every reward!
For more CPJourney guides, mascot trackers, game updates, and more – join our Discord!

The premise of the game is similar to the first version of the Infinite Tower: you will advance through floors to climb while fighting enemies, dodging traps, and collecting treasure along the way. The distance you travel is measured by meters, rather than floors. You climb 2 to 4 meters for each completed floor. The objective of the game is to climb the tower as high as you can (and beat the secret boss fight)!
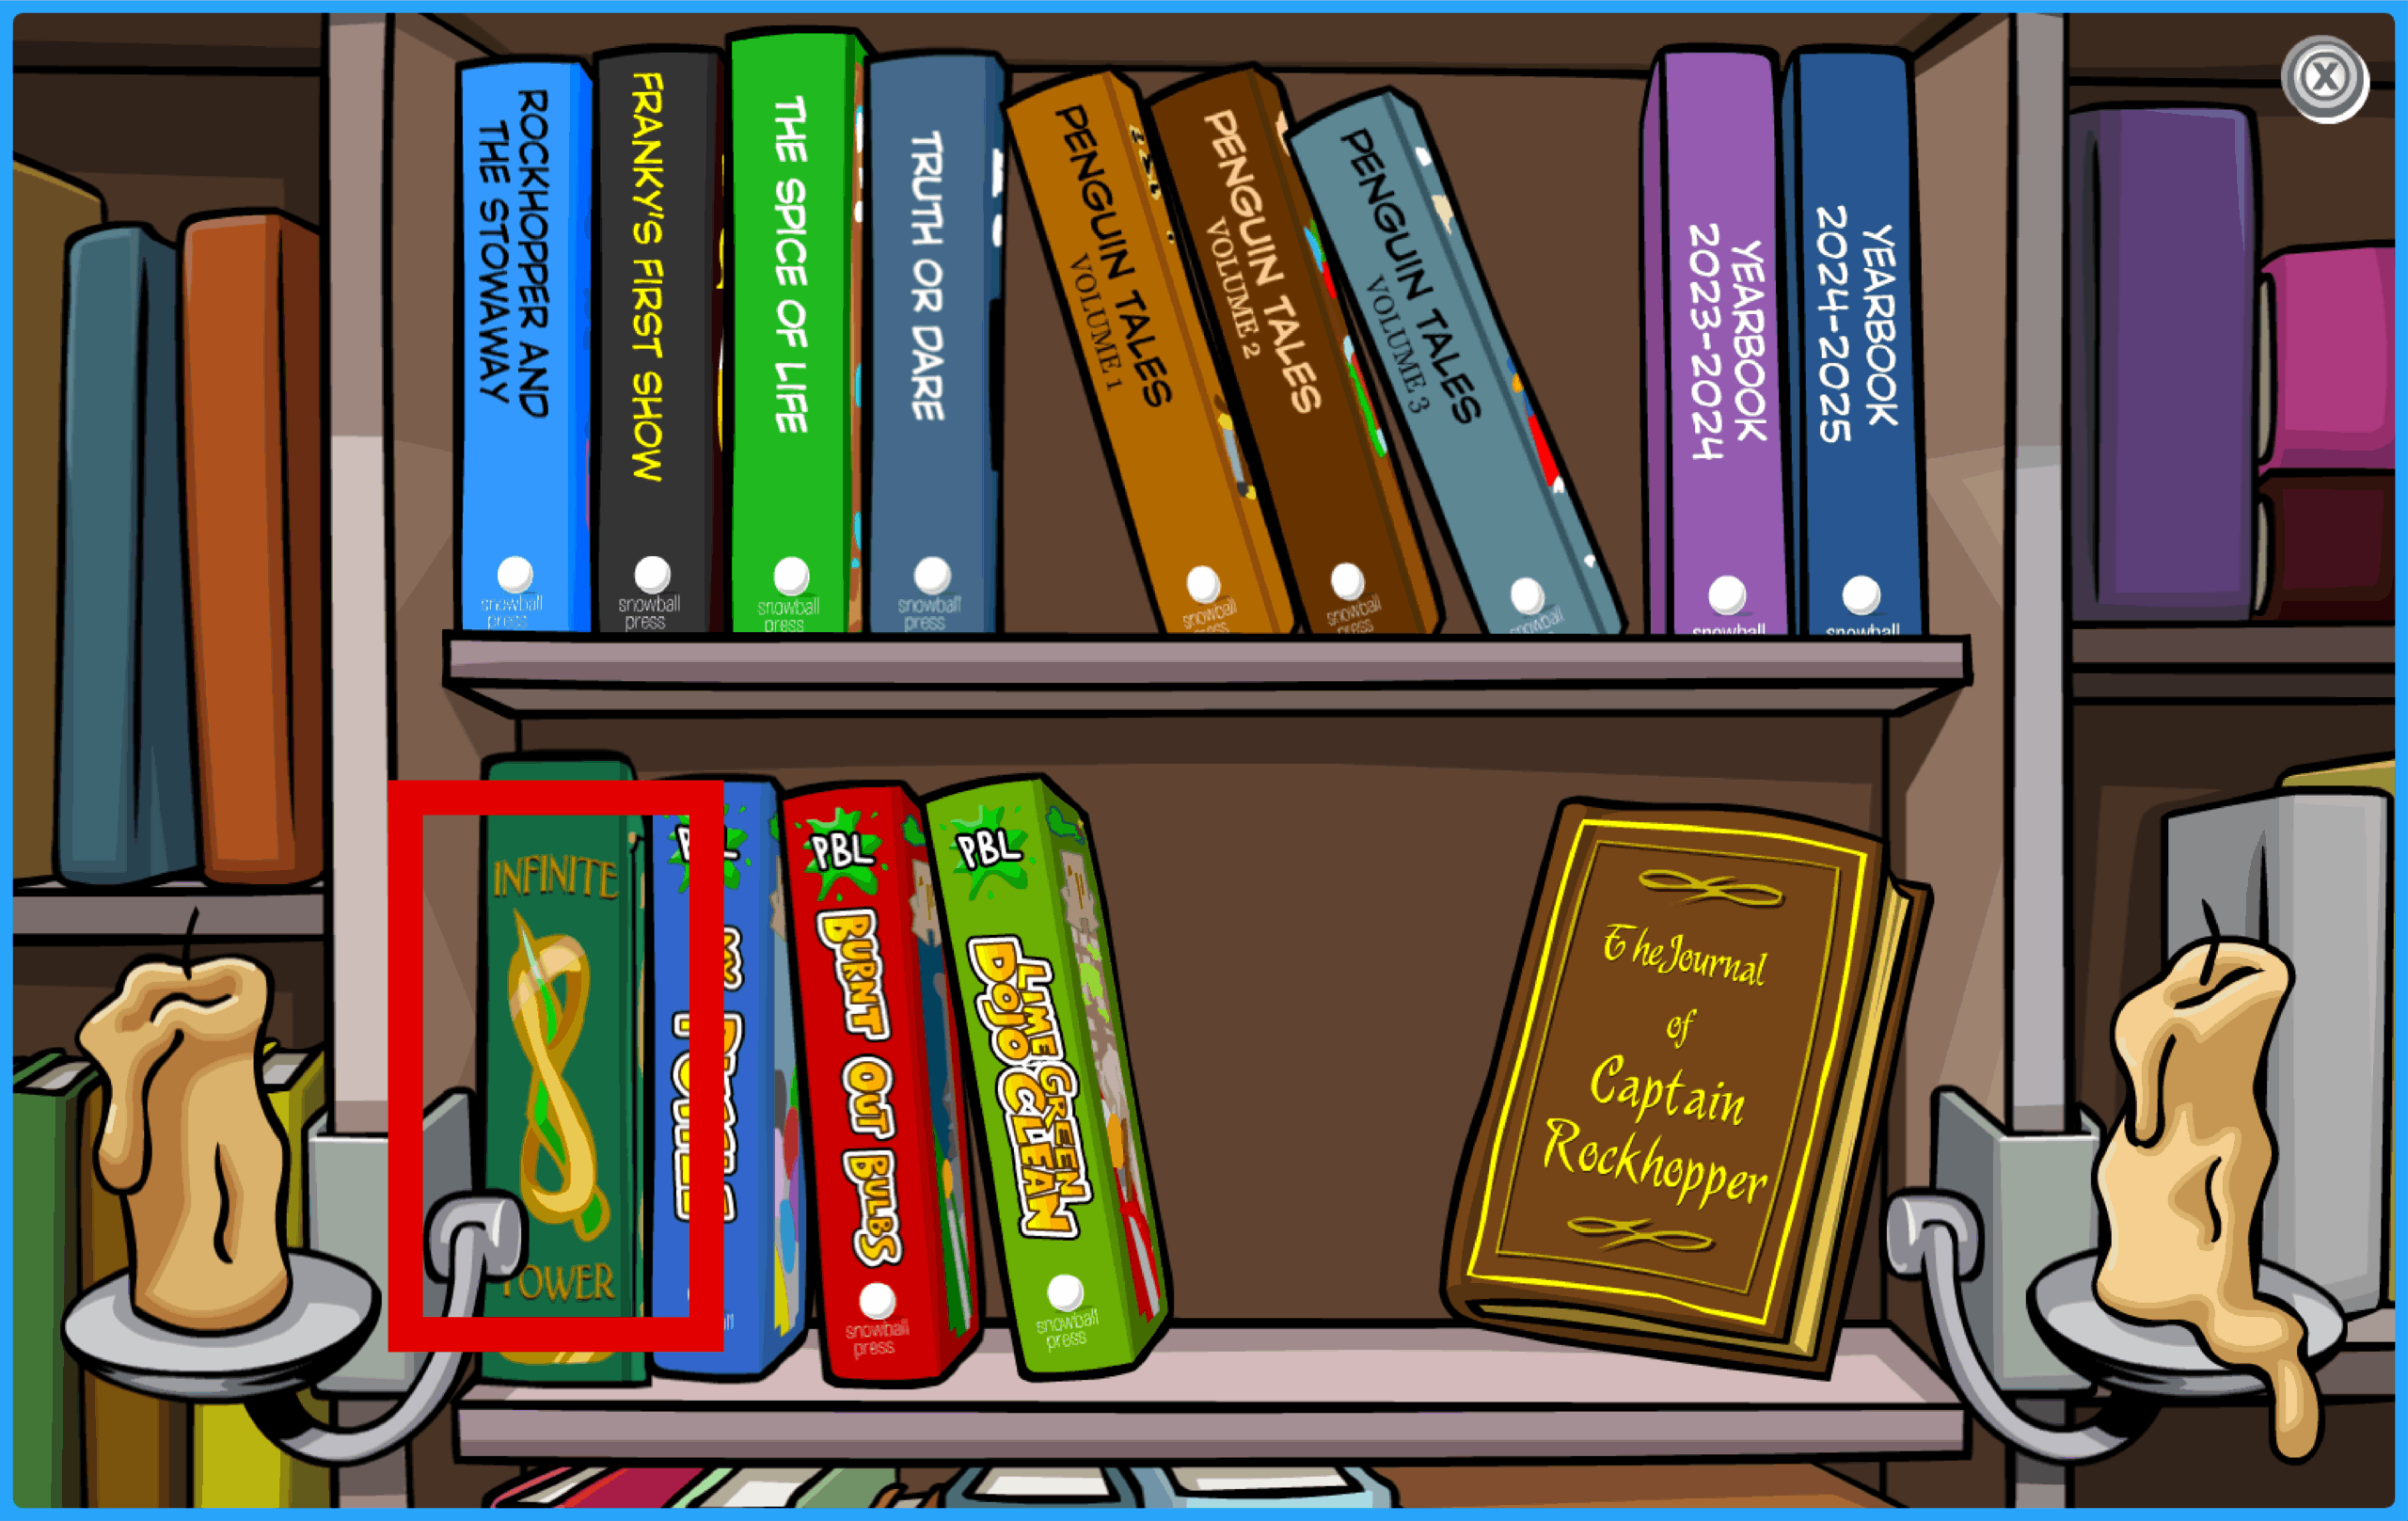
To access the Infinite Tower, head to the Book Room above the Coffee Shop. From here, interact with the book shelf and click the “Infinite Tower” book on the far lefthand side of the bottom shelf to begin your climb.

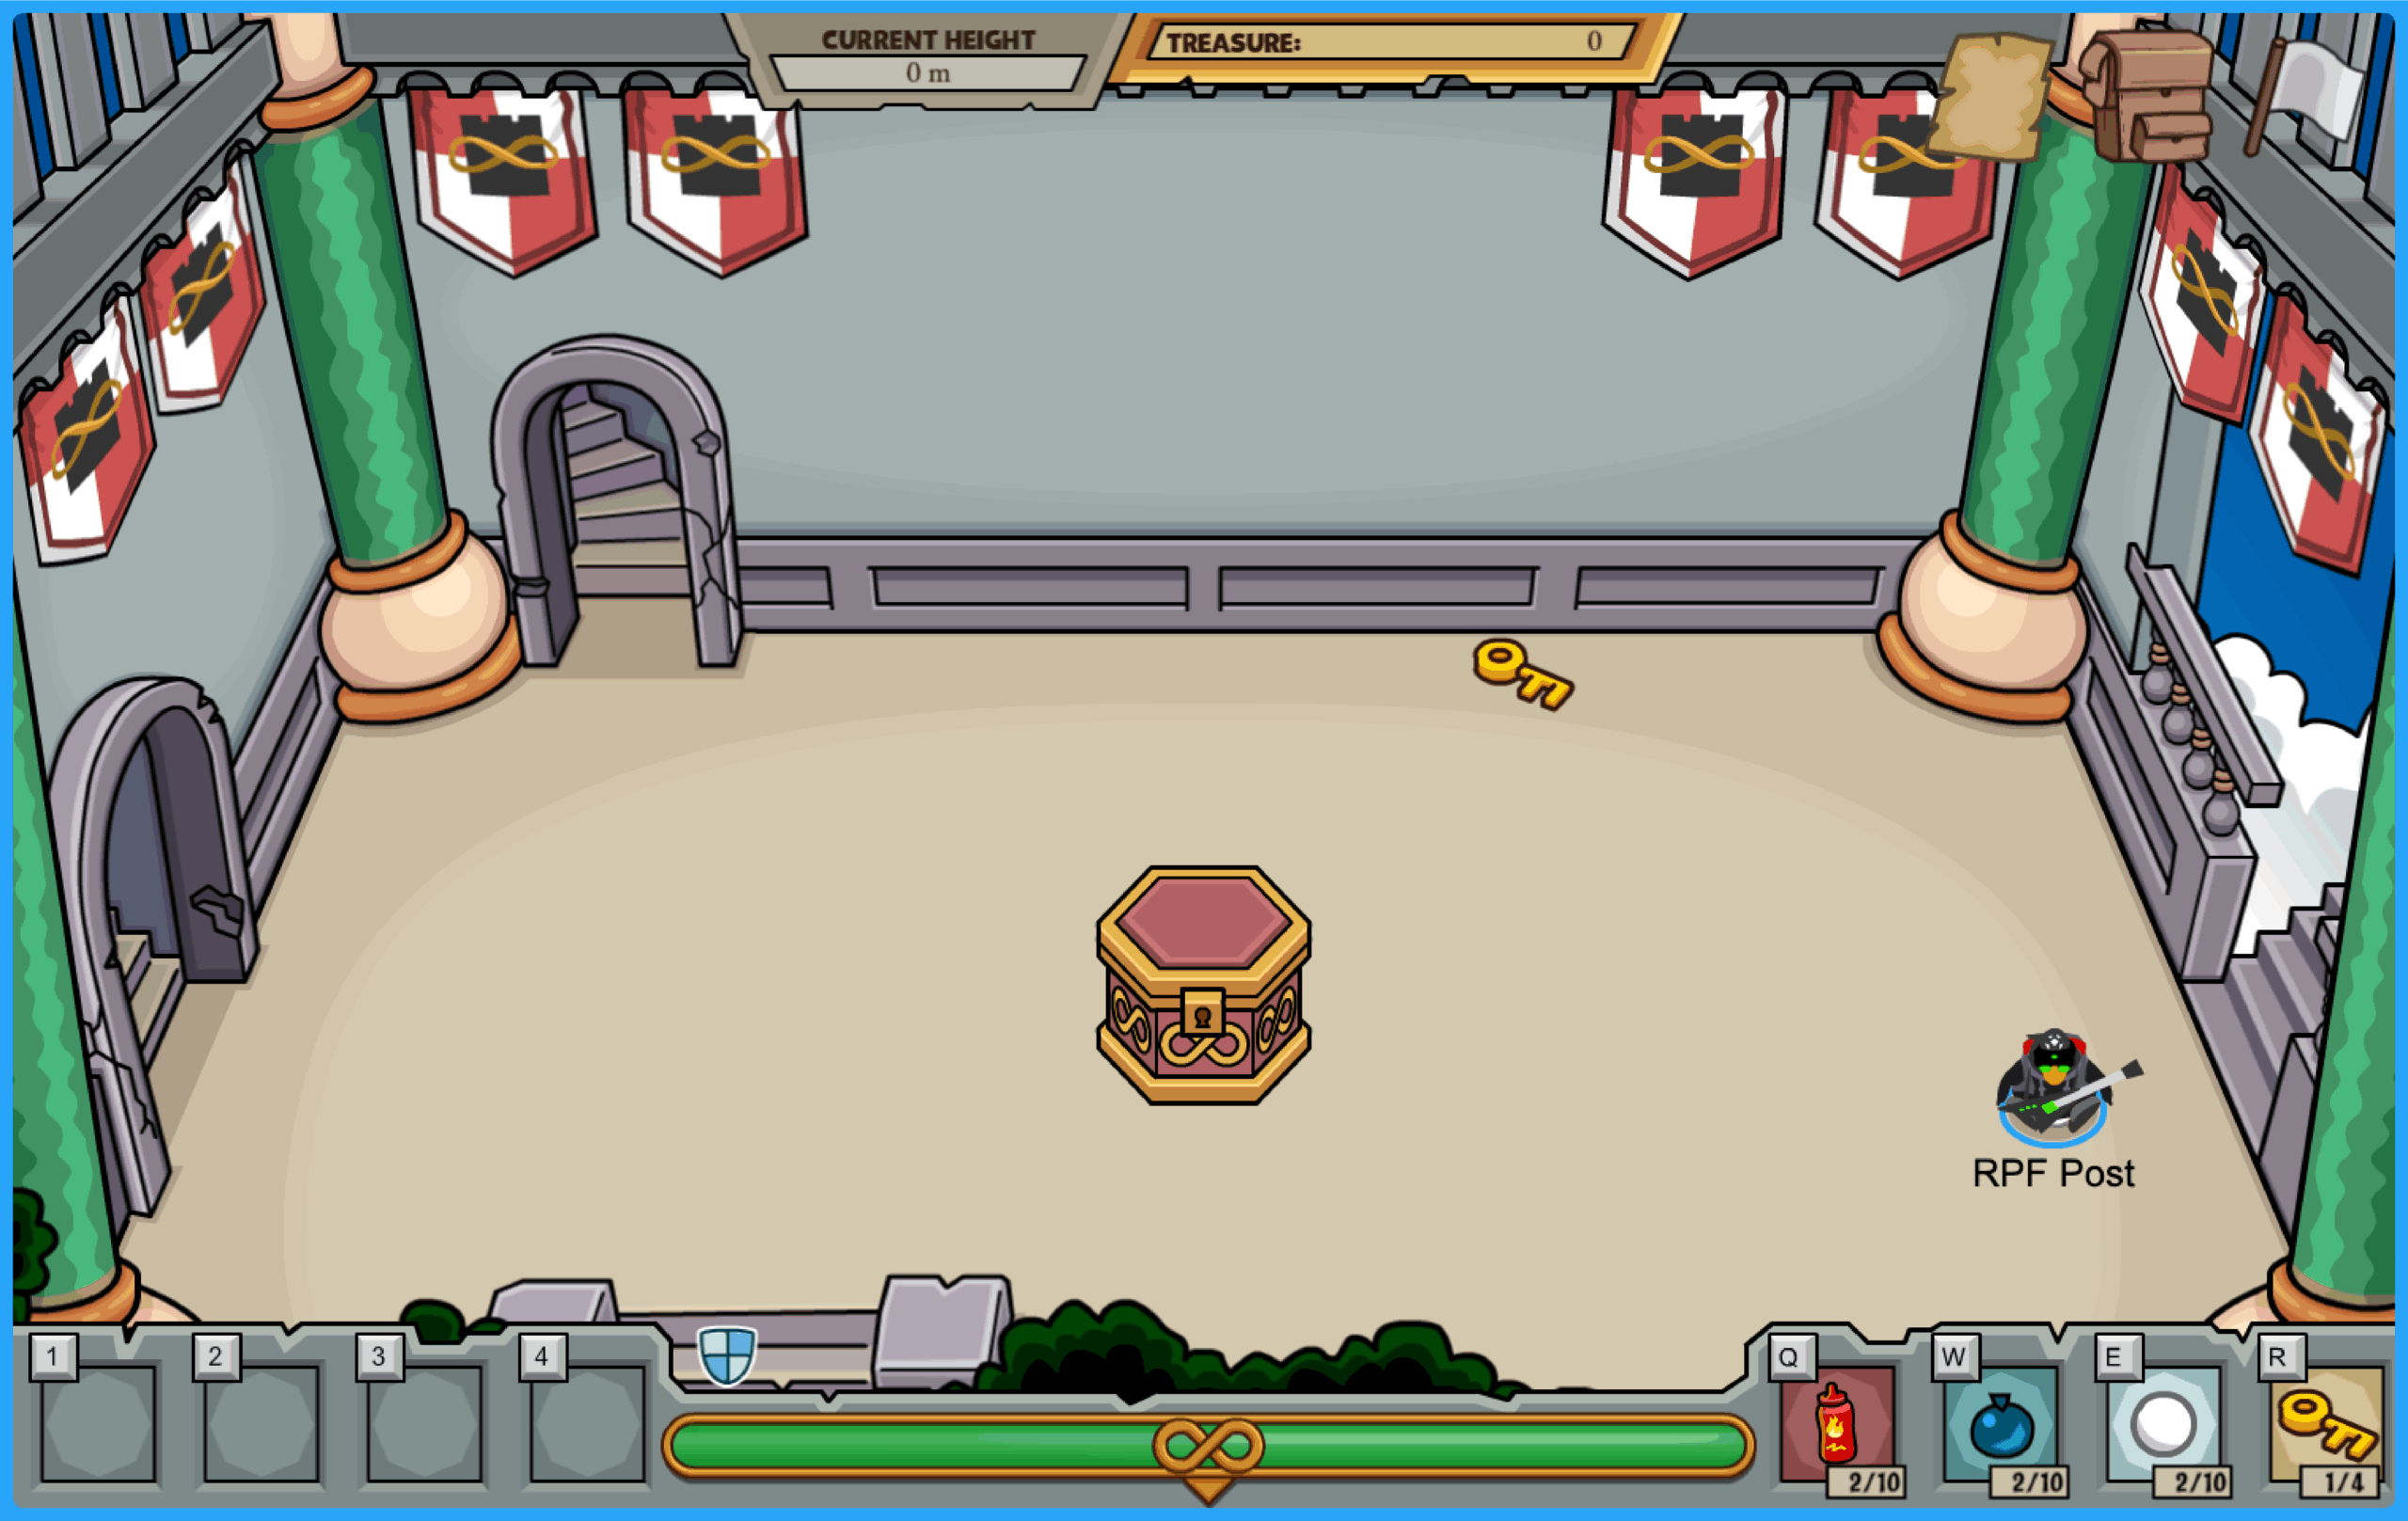
The game interface consists of a health bar, four slots on the left for Artifacts, and four slots on the right for elemental throws and keys. The top of the interface keeps track your total height climbed, the amount of treasure you have collected, any notes you have found, your Artifact backpack, and a surrender flag.

These four slots are where you will place any Artifacts you find throughout your climb. They bind to the 1, 2, 3, and 4 keys on your keyboard. Artifacts can come in the form of weapons, equipment, or support, and each one has their own unique strengths and buffs – we’ll go through them in detail all later in this guide. Using any of your Artifacts is just a matter of hitting its respective key to activate its effects, or hitting its respective key and clicking on or near an enemy to strike with that weapon.


Your health bar and shields can be seen here. If a hit is taken, a shield will be lost, followed by some of your health if you have no more remaining shields. Shields are regained upon completing a floor, and more shields can be gained through certain Artifacts.


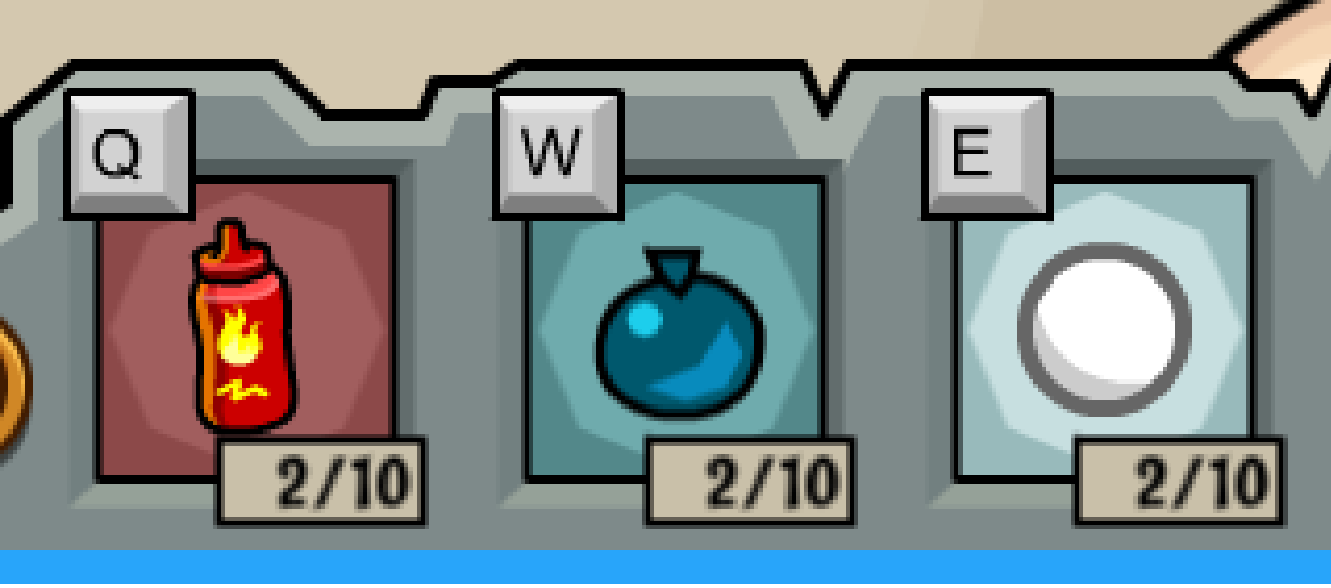
Elemental throws are your non-Artifact weapons that you can use throughout your climb. These consist of hot sauce bottles, water balloons, and snowballs. You will start out with 2 of each, and are bound to the Q, W, and E keys. Every room has the chance to spawn elemental throws. You can pick them up by clicking on them to walk over them, and can hold up to 10 of each type at a time. If you ever run out of elemental throws, no need to worry – after a few seconds, you will be given whichever throw you have run out of, up to 2 throws.

Keys are used to unlock Artifact chests that you’ll come across during your journey. They are bound to the R key, and you can hold up to 4 at a time. Every room has the chance to spawn keys, which are picked up by clicking on them to walk over them. Keys can also be found as drops after defeating enemies in battle rooms.


This just keeps track of how high you have made it in the tower. Keep playing to get a new personal best and beat your score!


This keeps track of the amount of treasure you have acquired. Treasure can be spent at the Jester’s shop in break rooms on physical items to wear in Club Penguin Journey, or on Artifacts that will help with your gameplay. Every room has the chance to spawn treasure piles, which are picked up by clicking on them to stand on top of them. For larger treasure piles, you will need to stand in place until the pile is fully picked up.


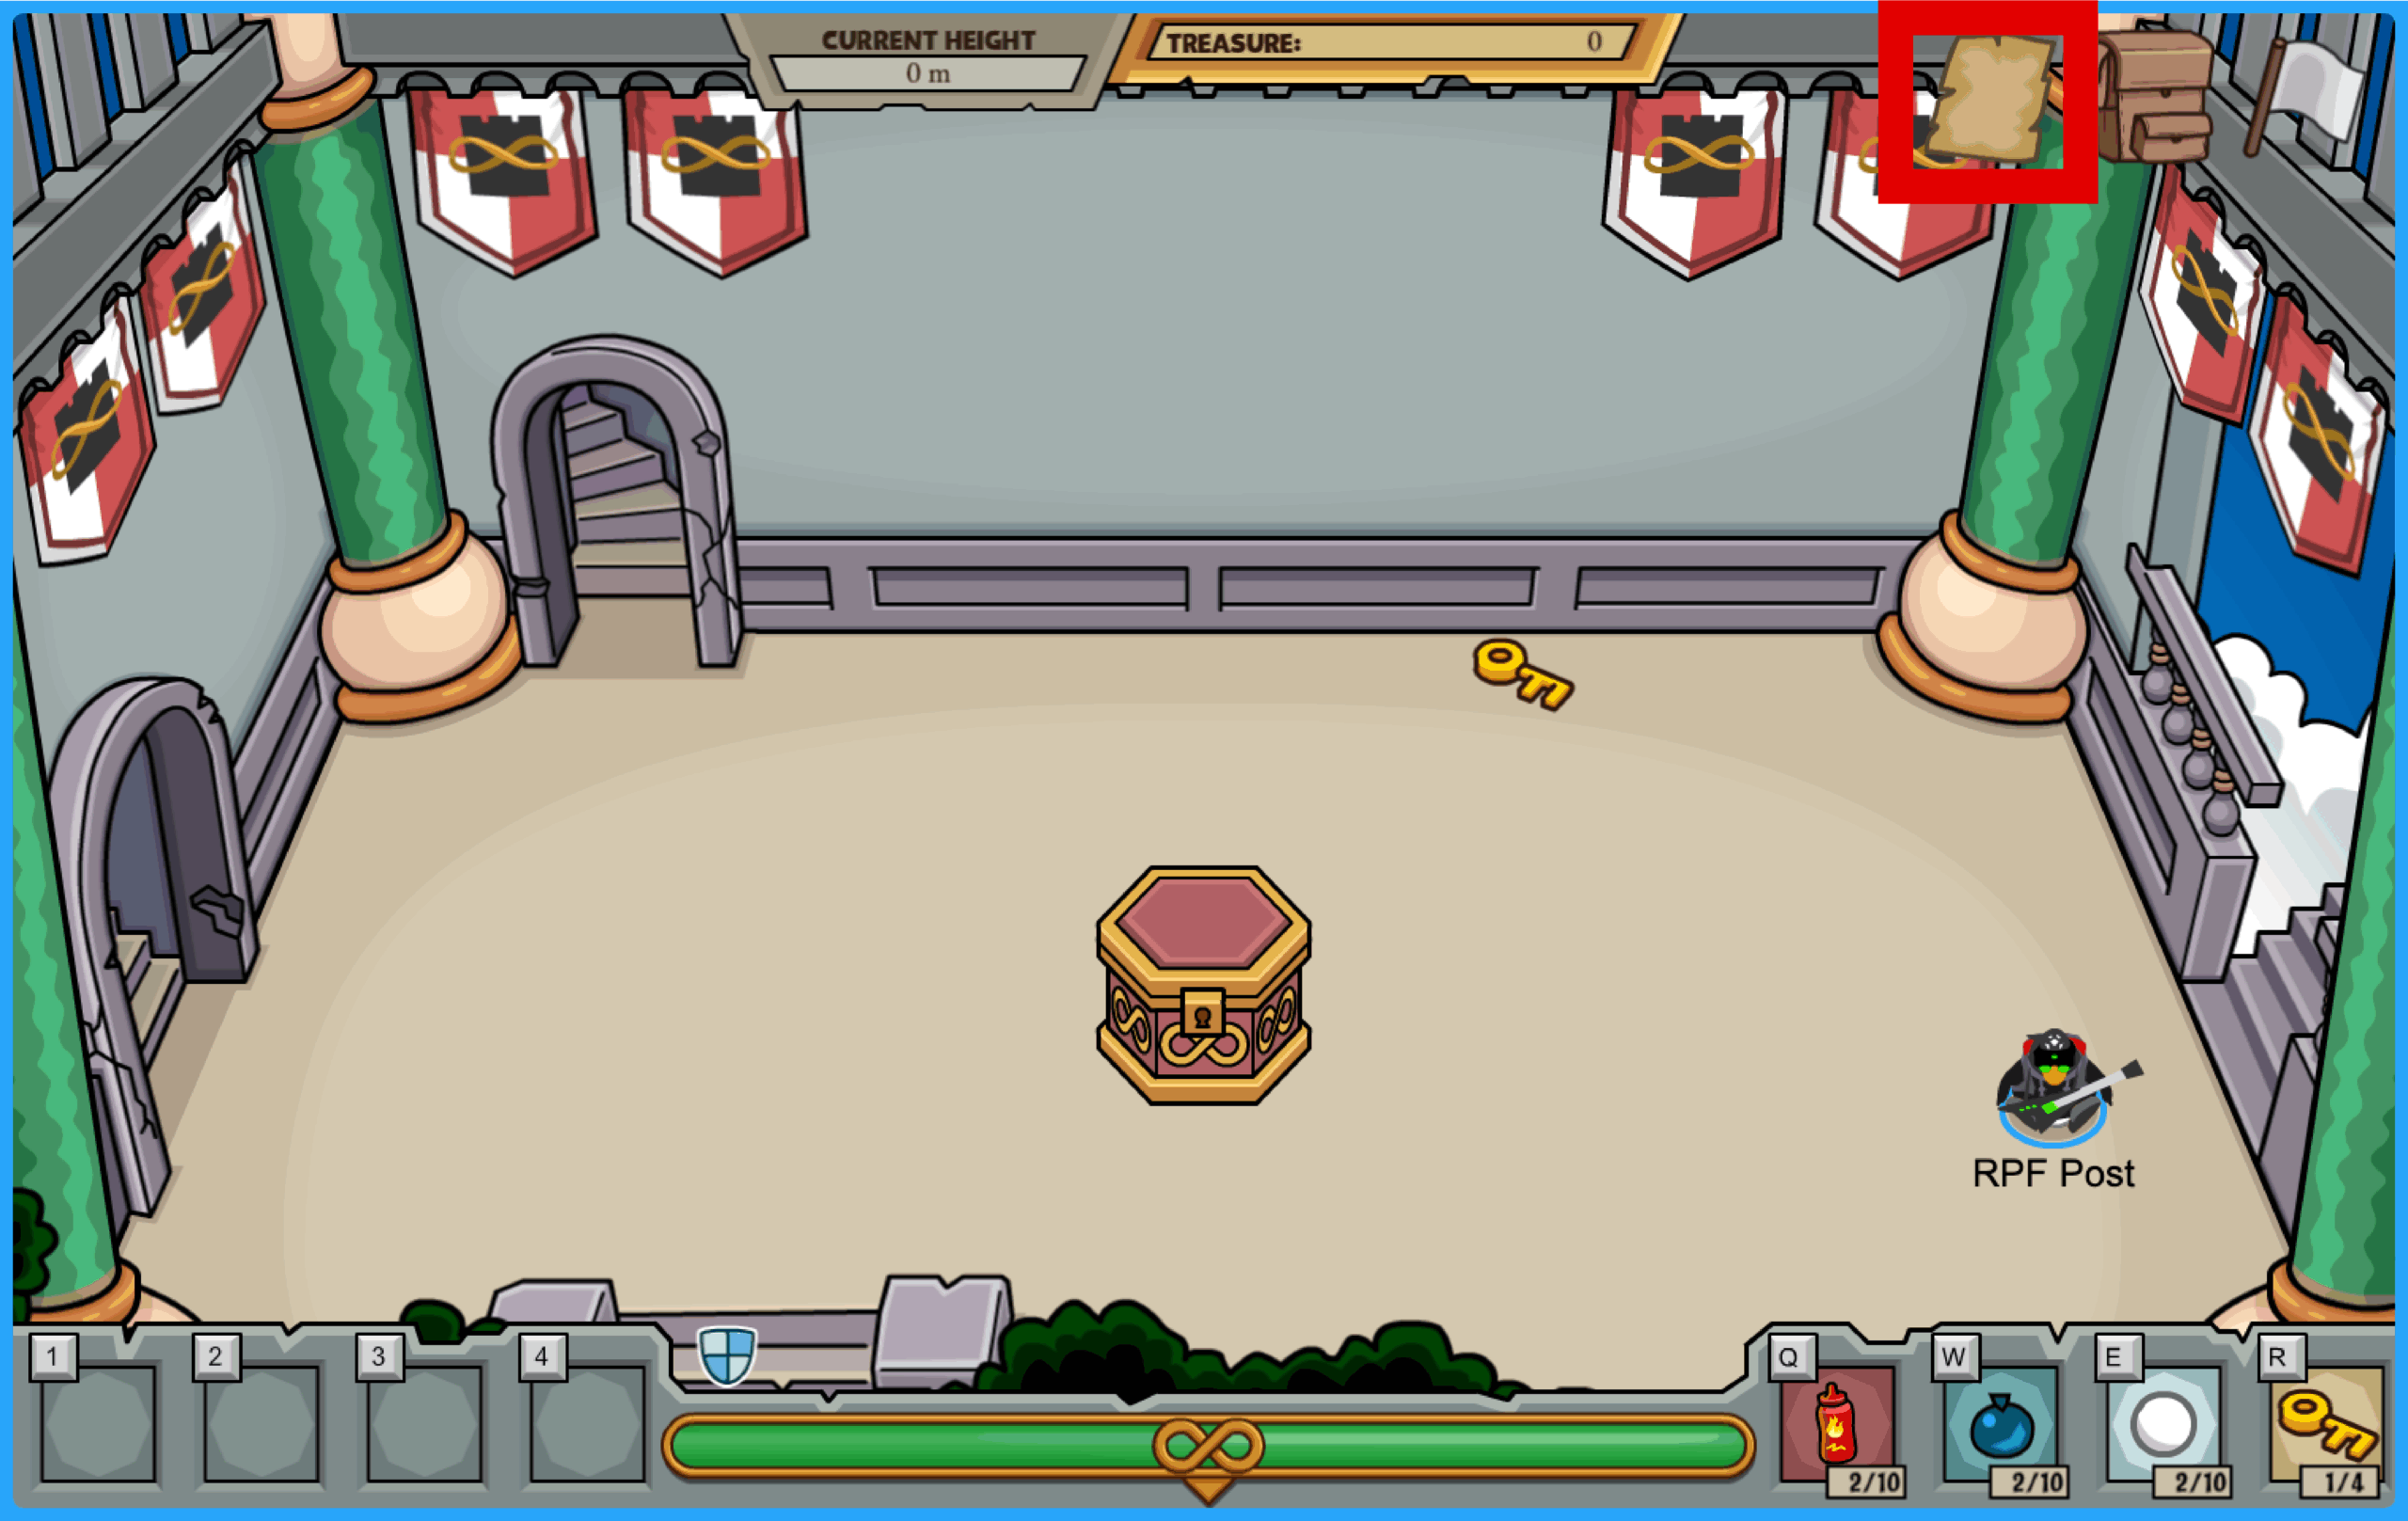
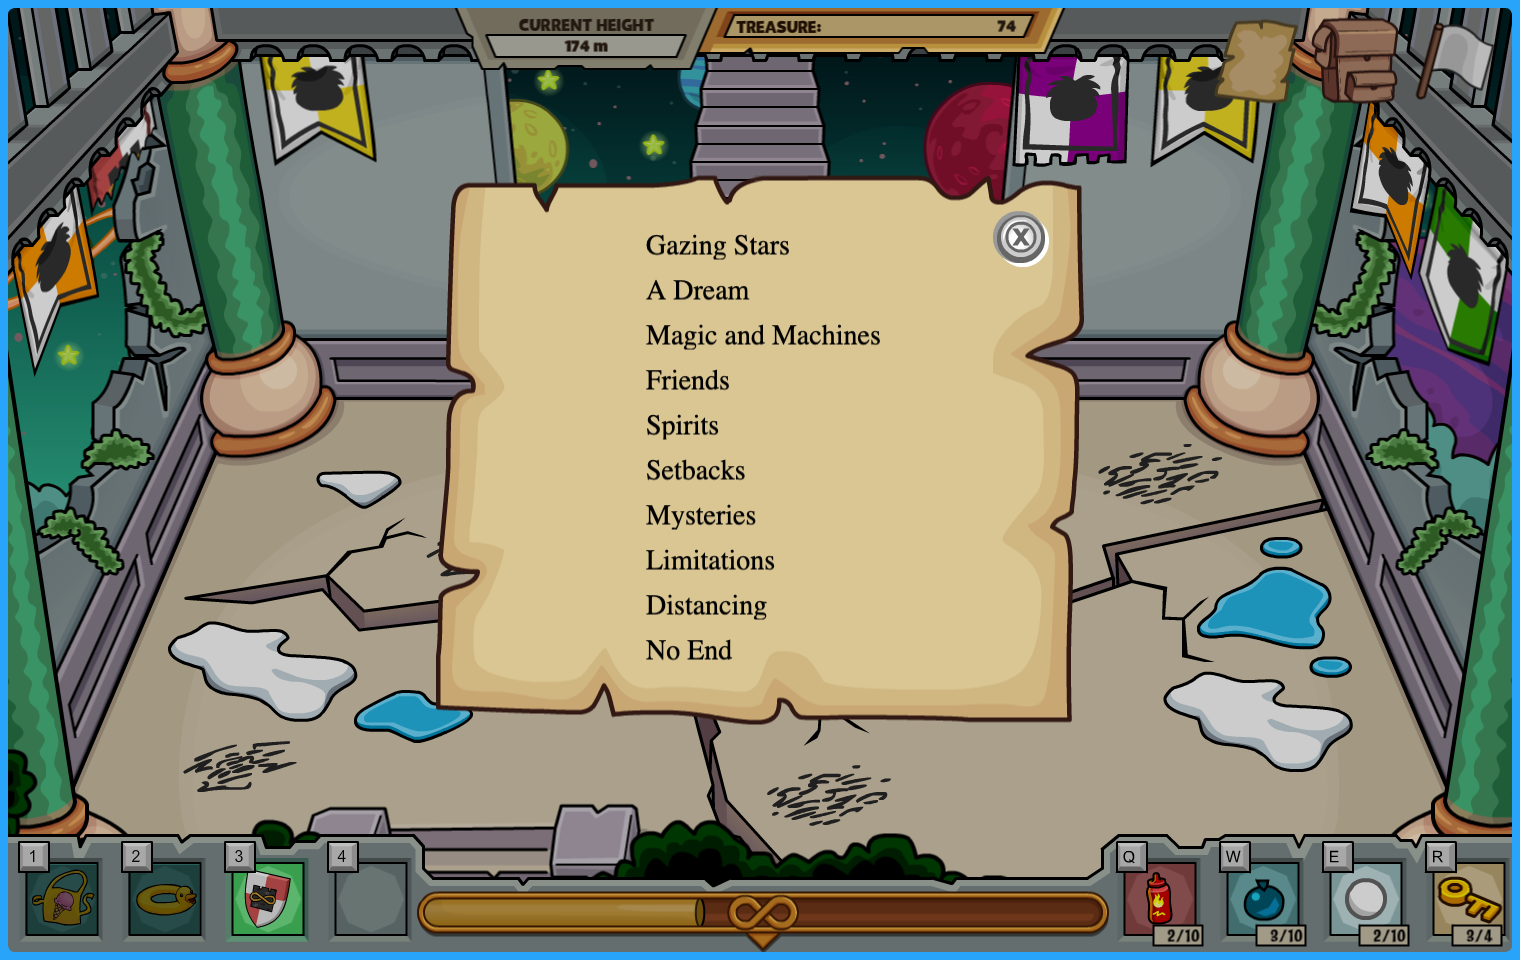
Throughout your time spent in the Infinite Tower, you might come across some rather interesting notes regarding the origins of the magical structure. Click here to view them at any time.

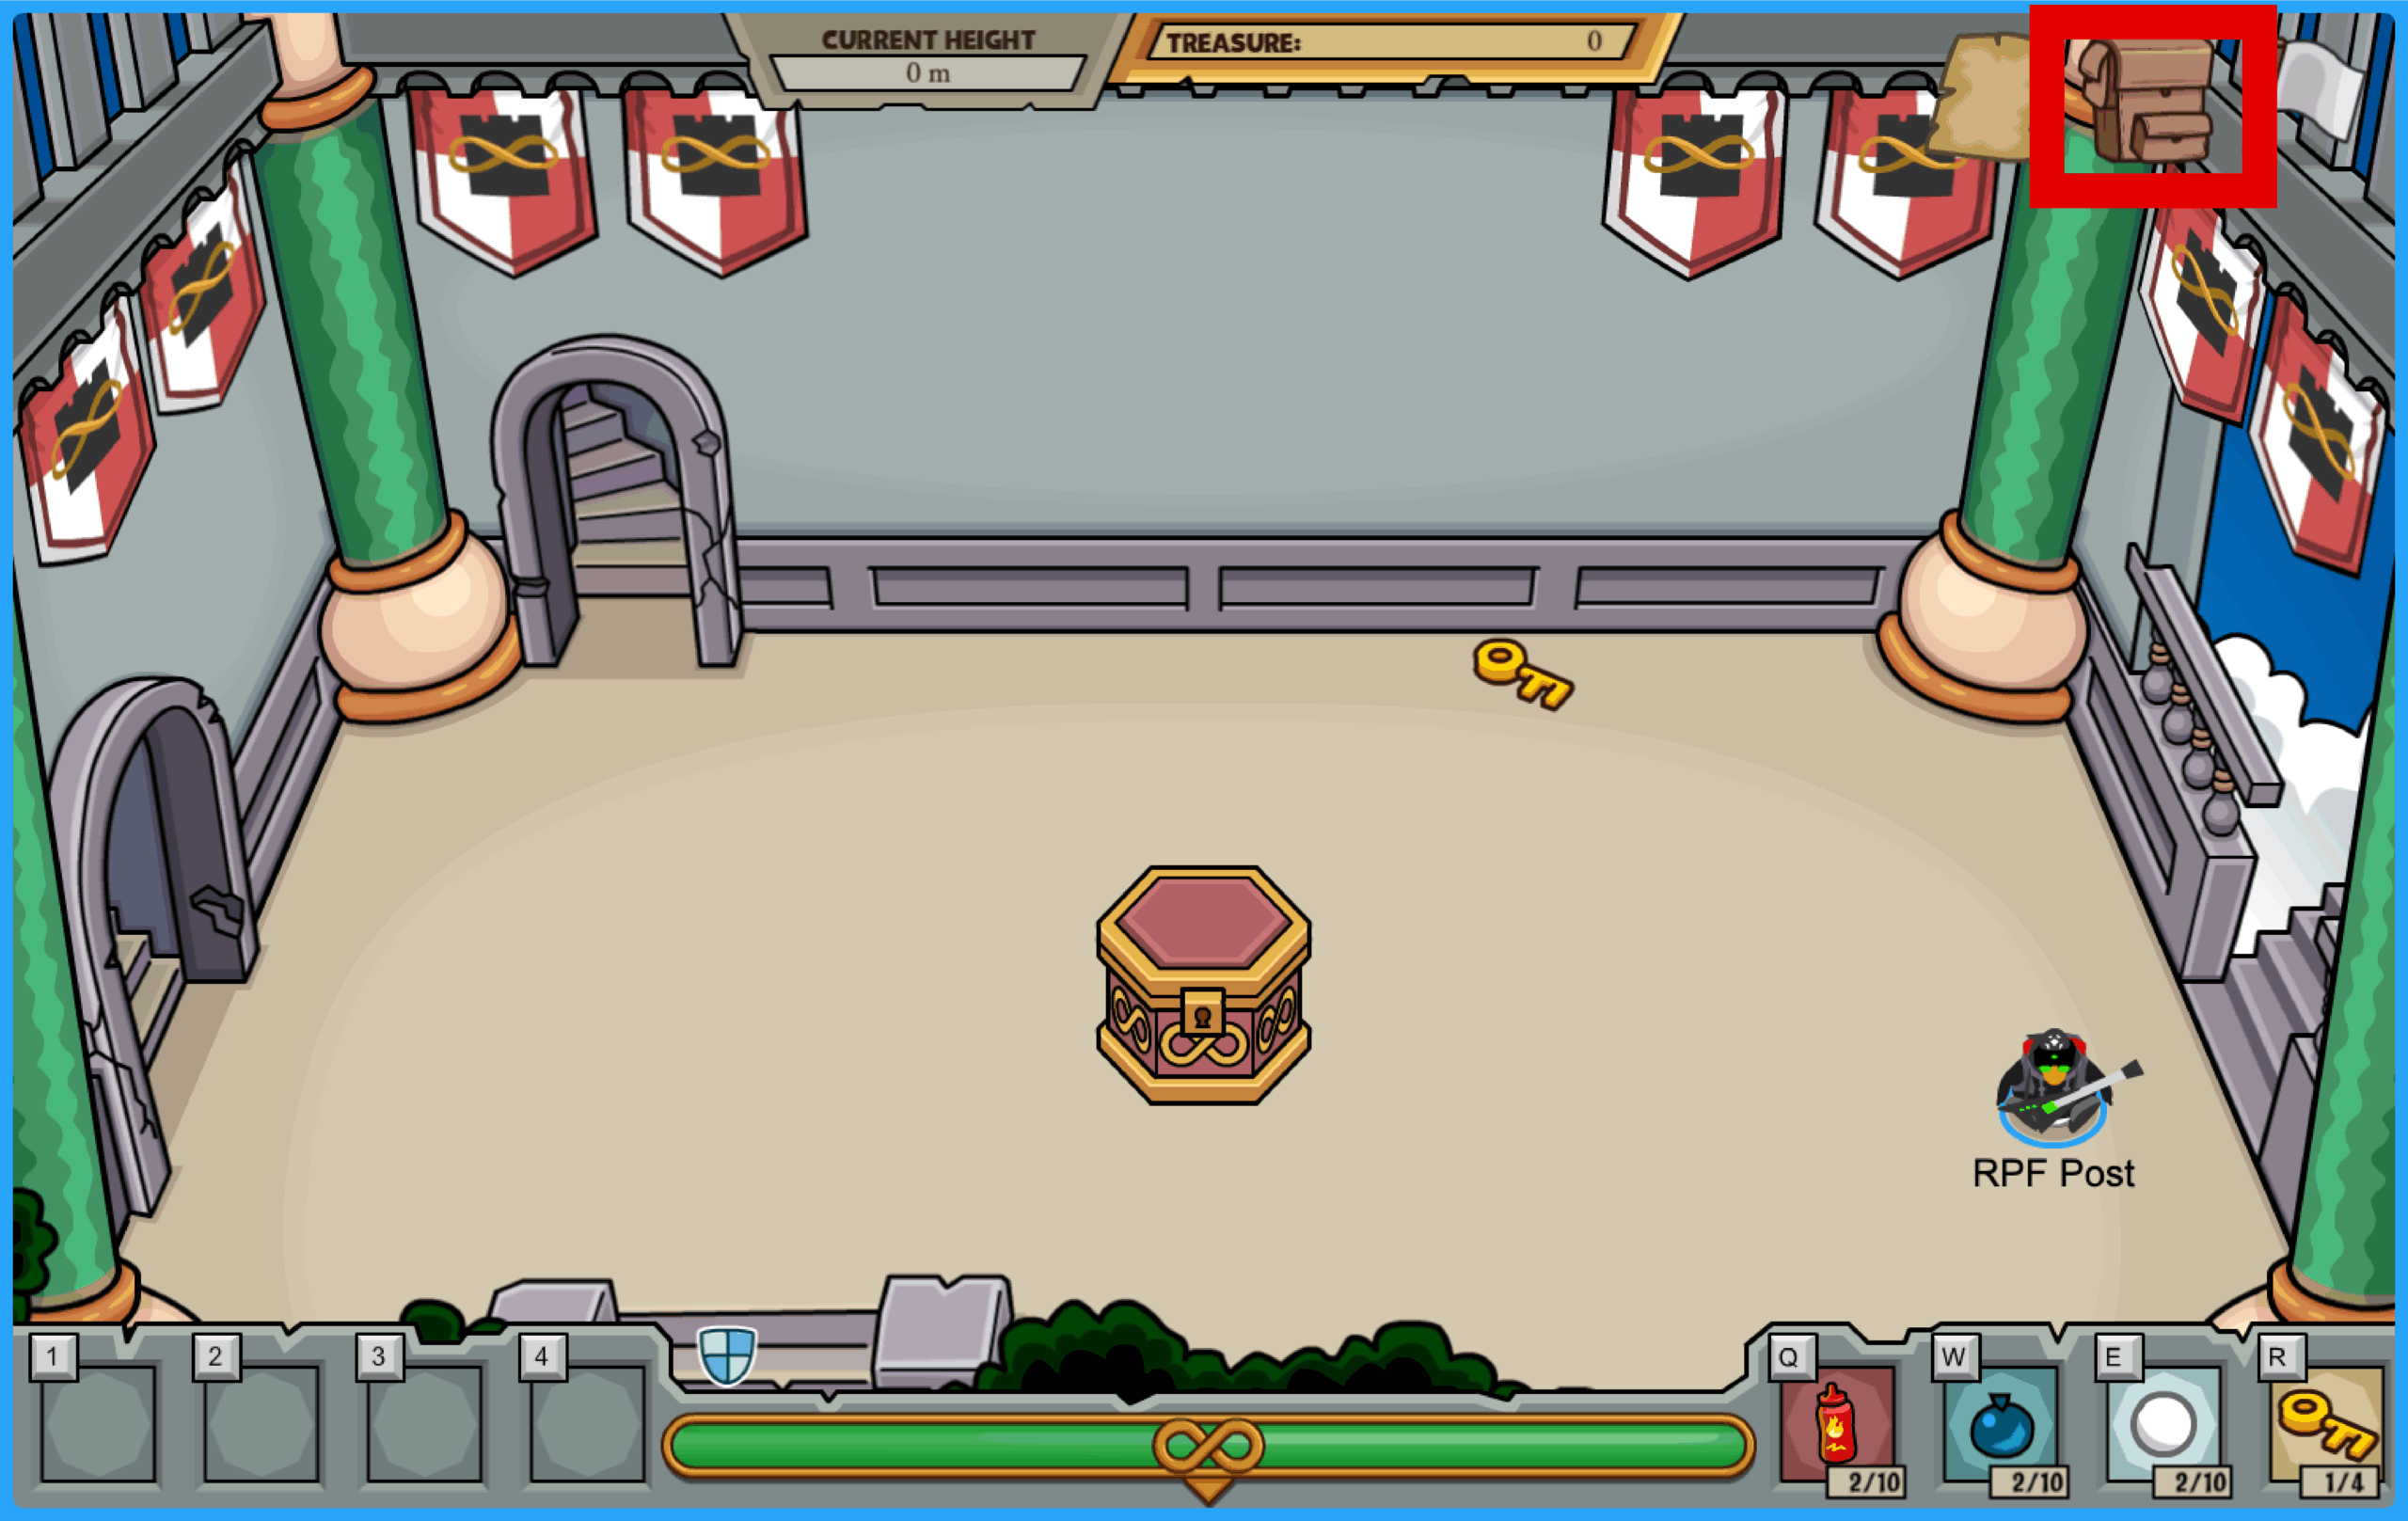
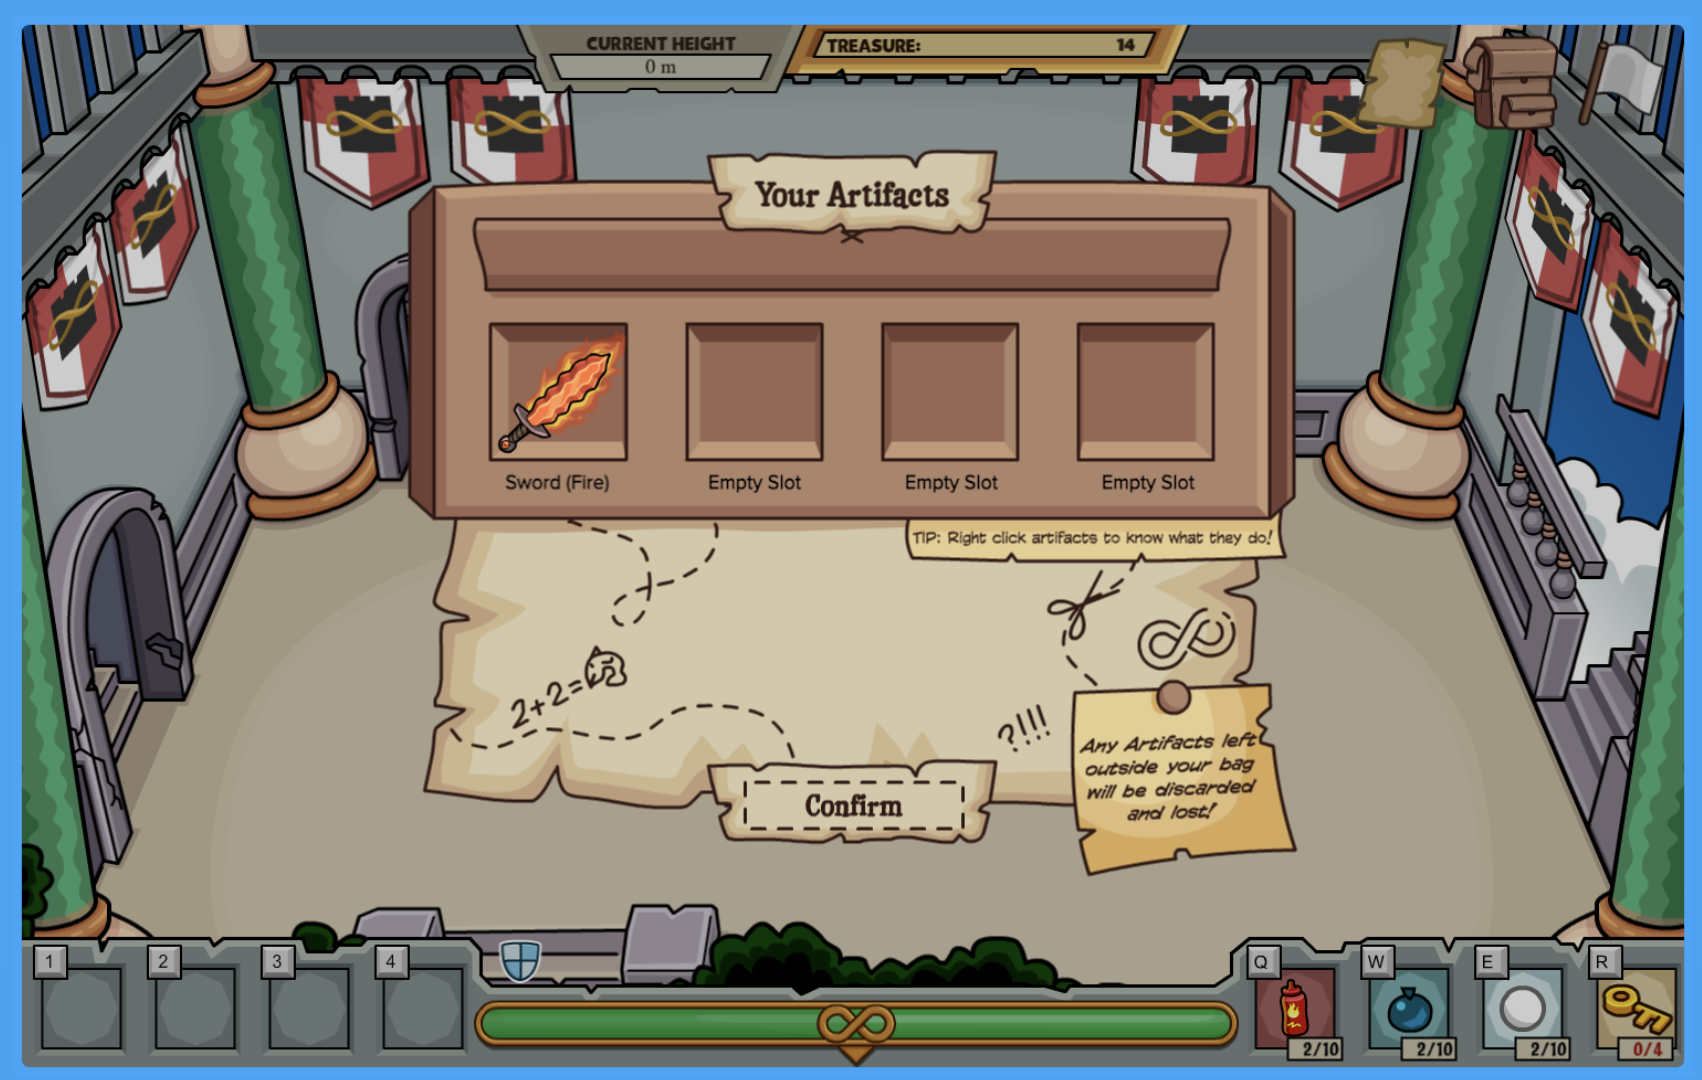
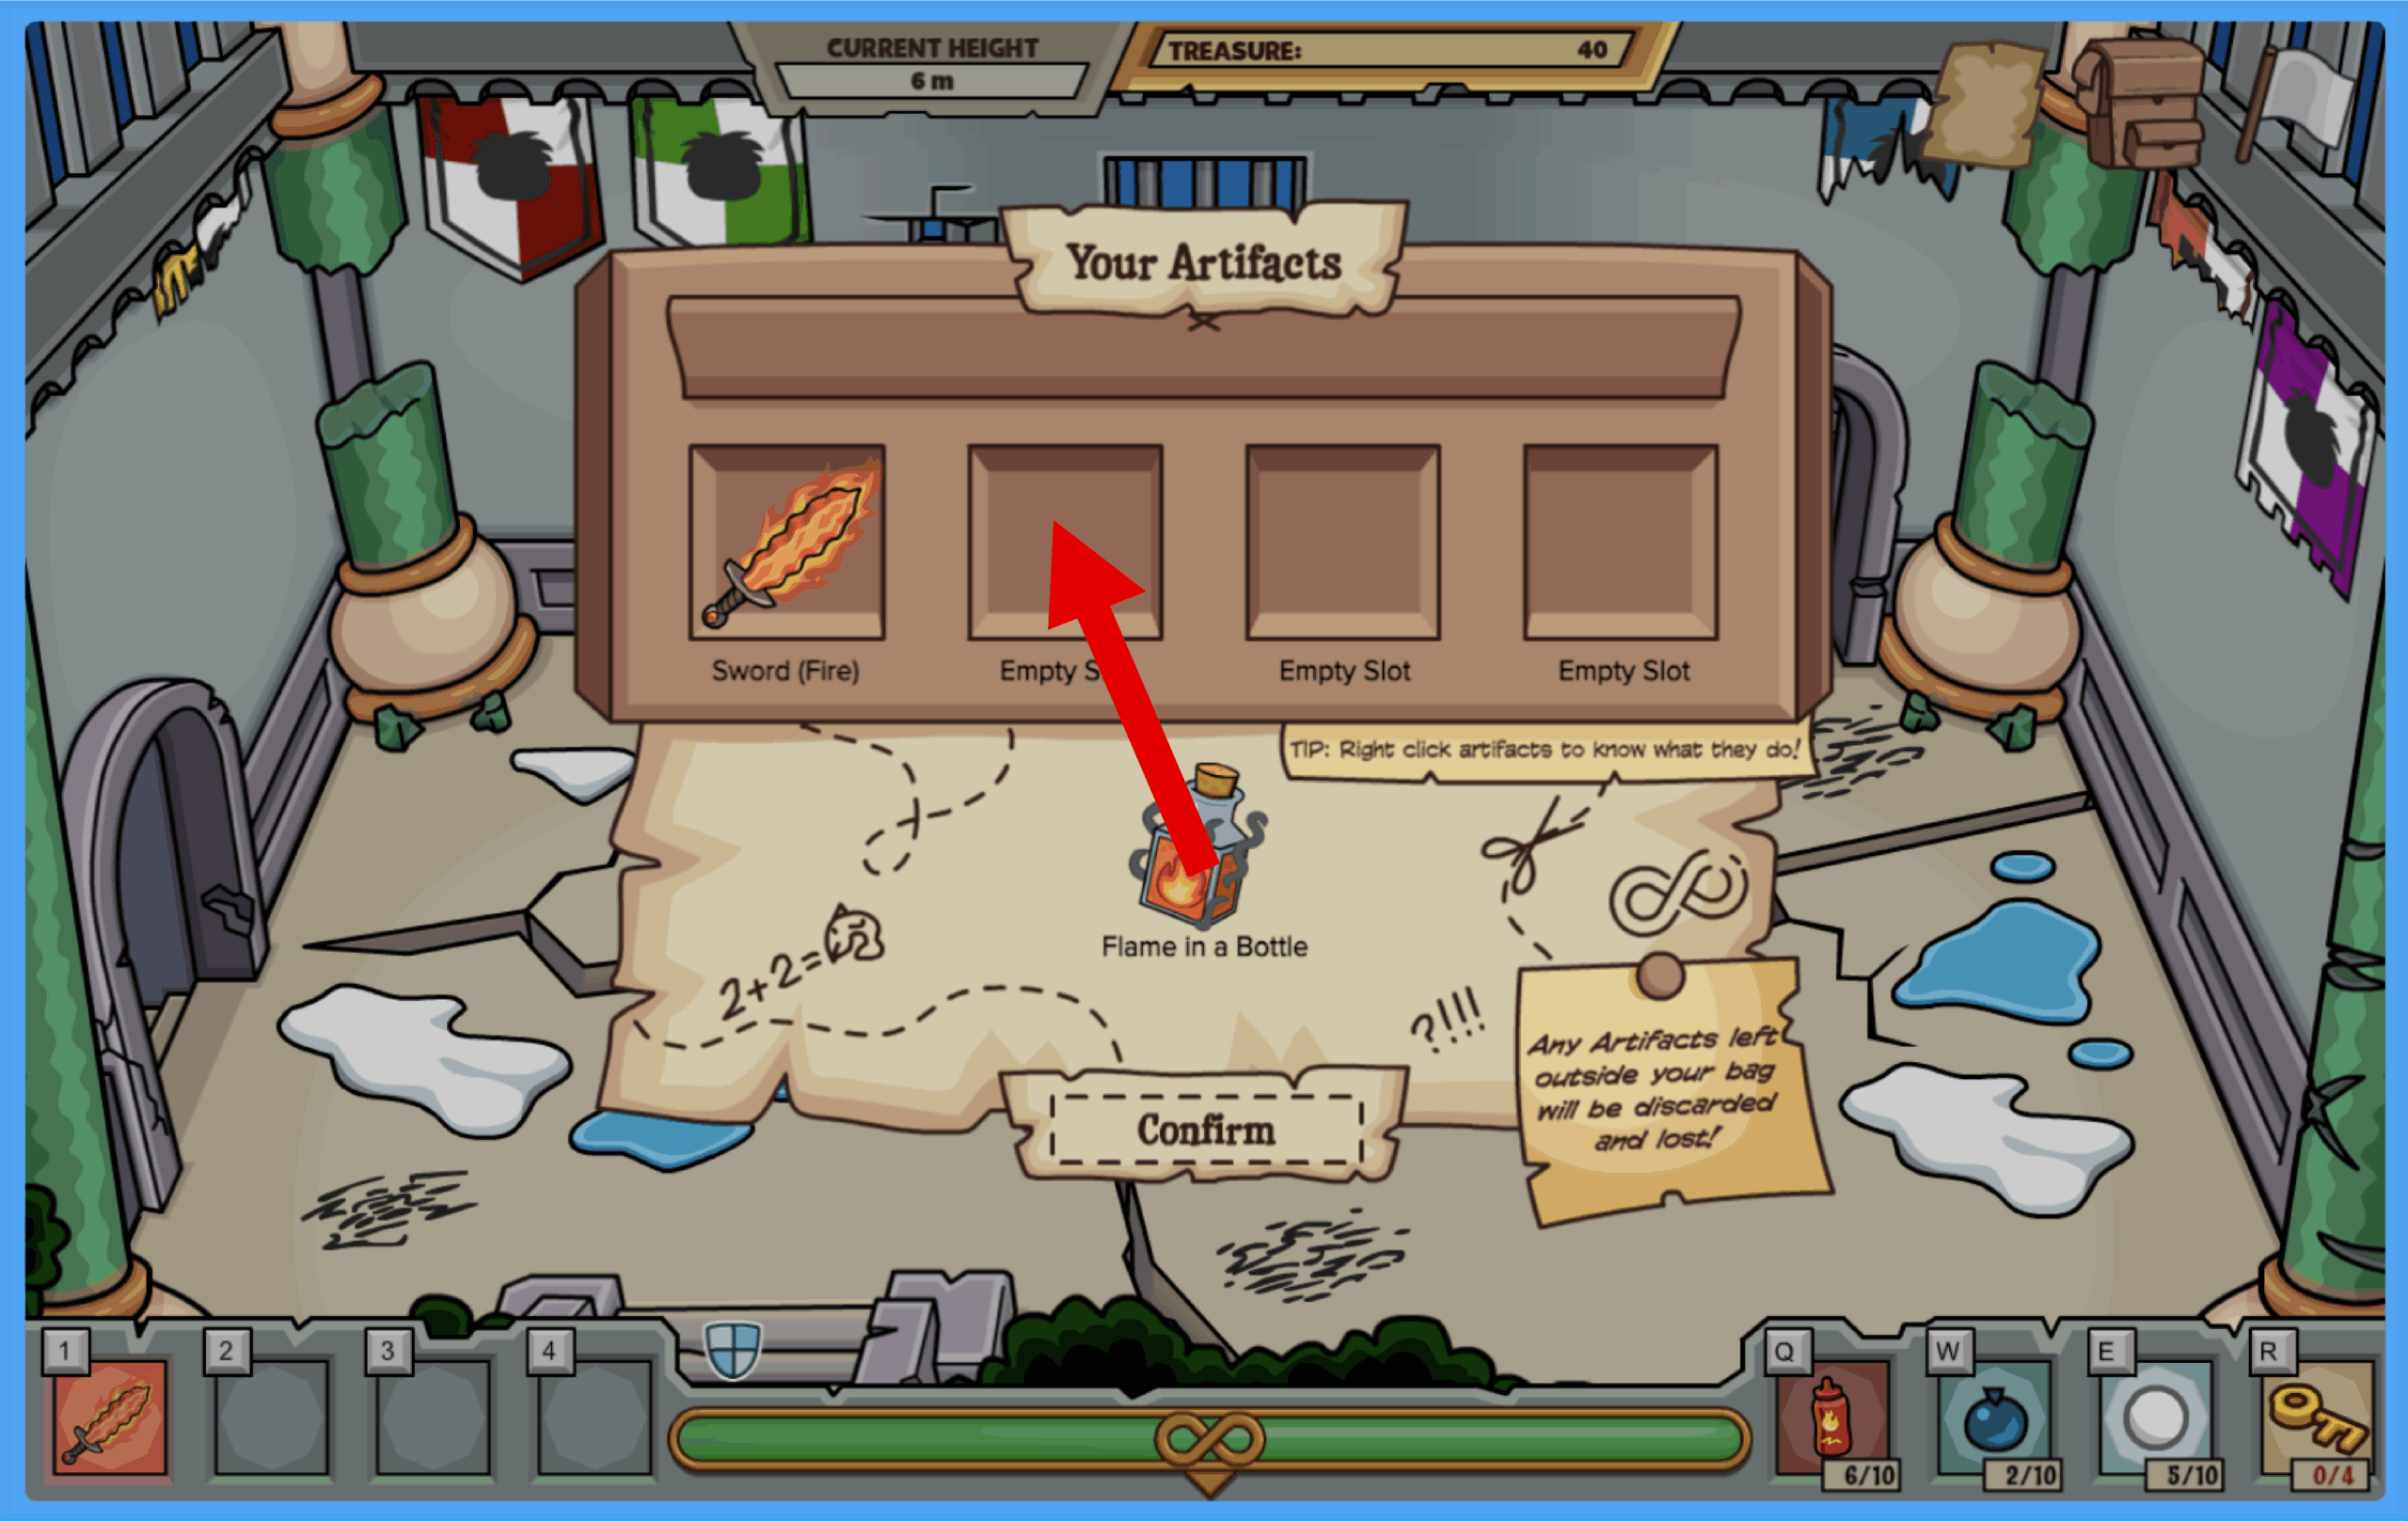
This is where you can view all of your current Artifacts. You can right click on any to view what each Artifacts’ respective strengths and qualities are.

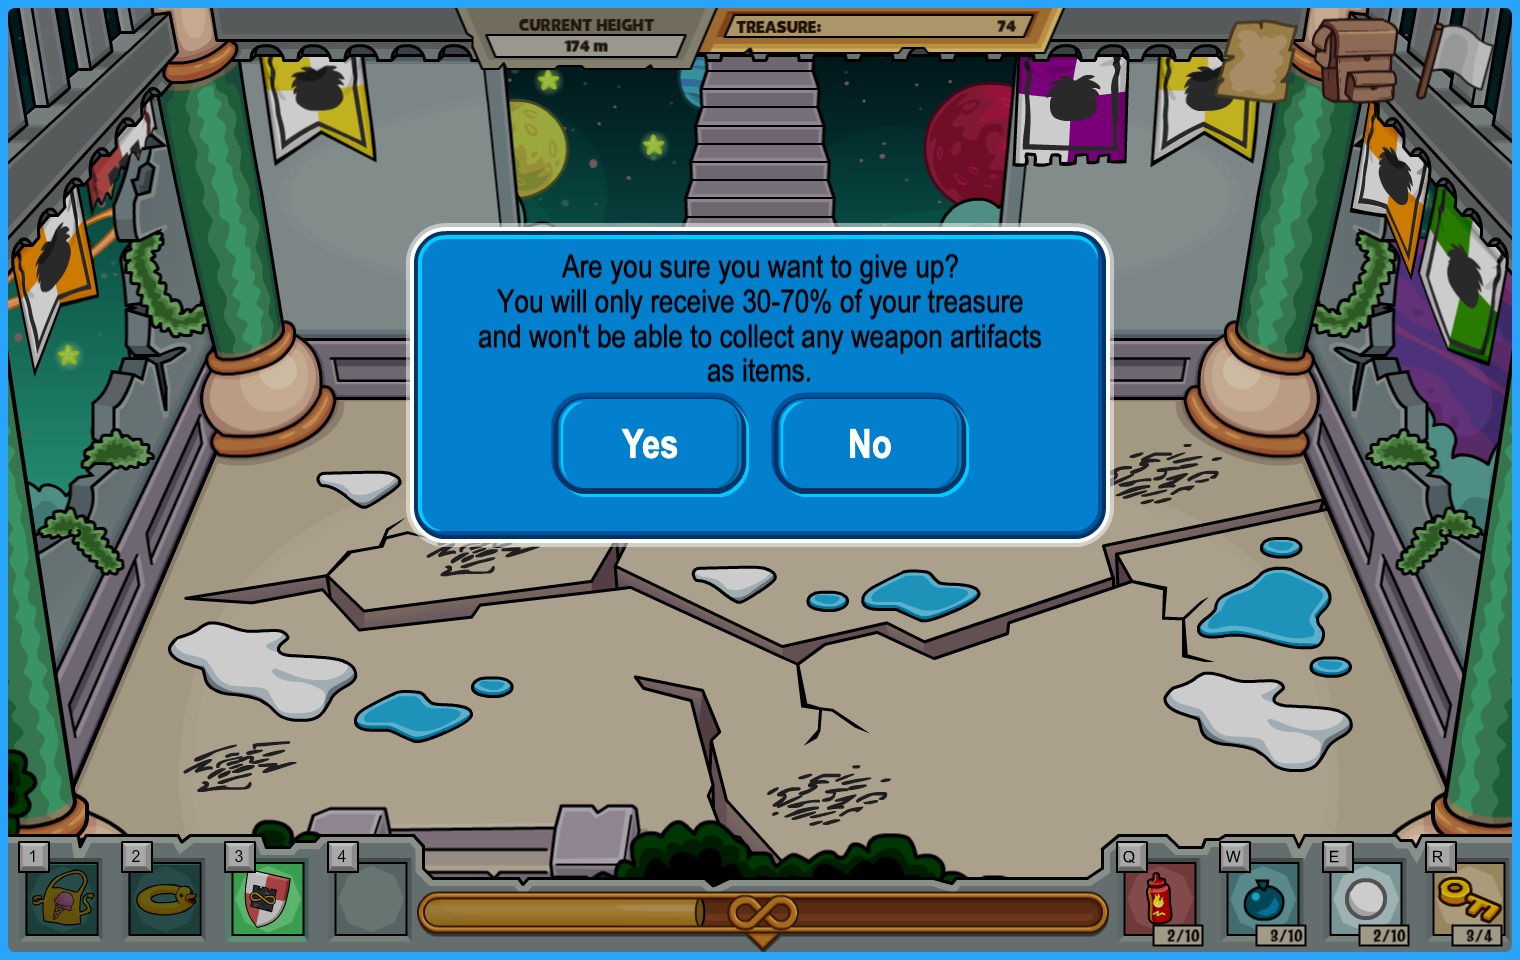
If you need to leave the Infinite Tower and have yet to reach a break room, you can click here to wave your white flag and surrender, exiting the game. By clicking this however, you only receive 30-70% of their treasure and won’t keep any of your physical item Artifacts.
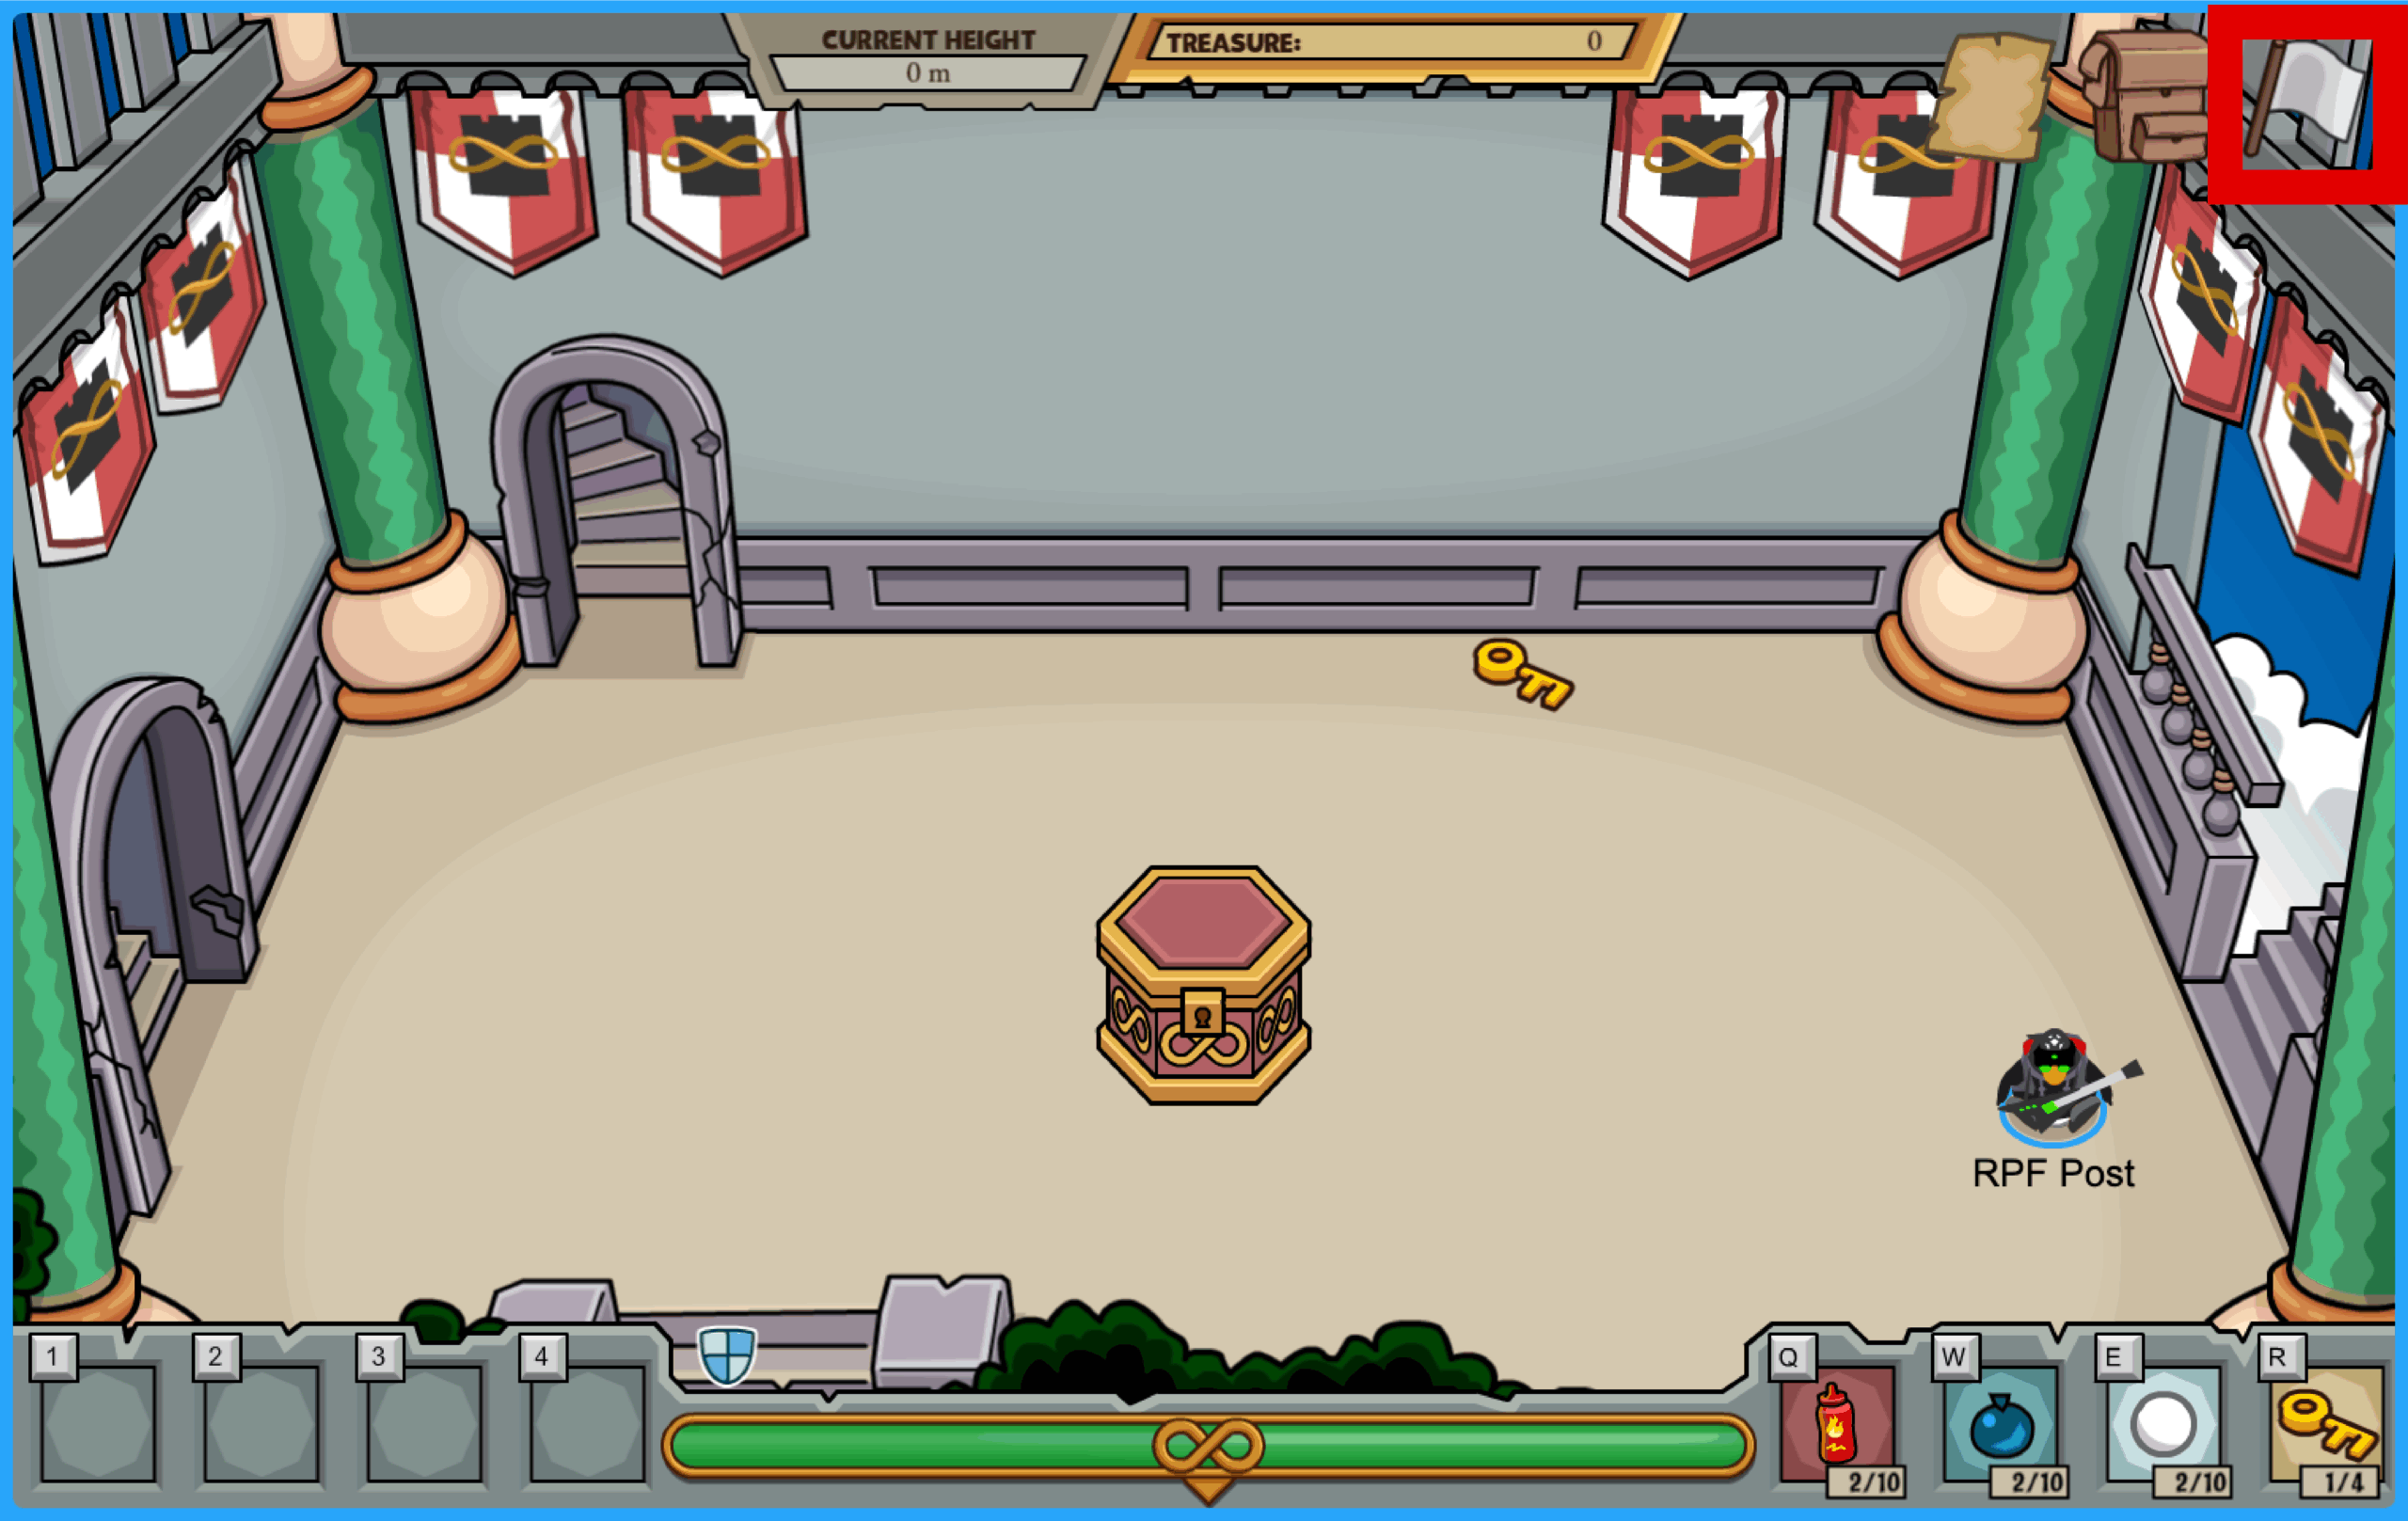

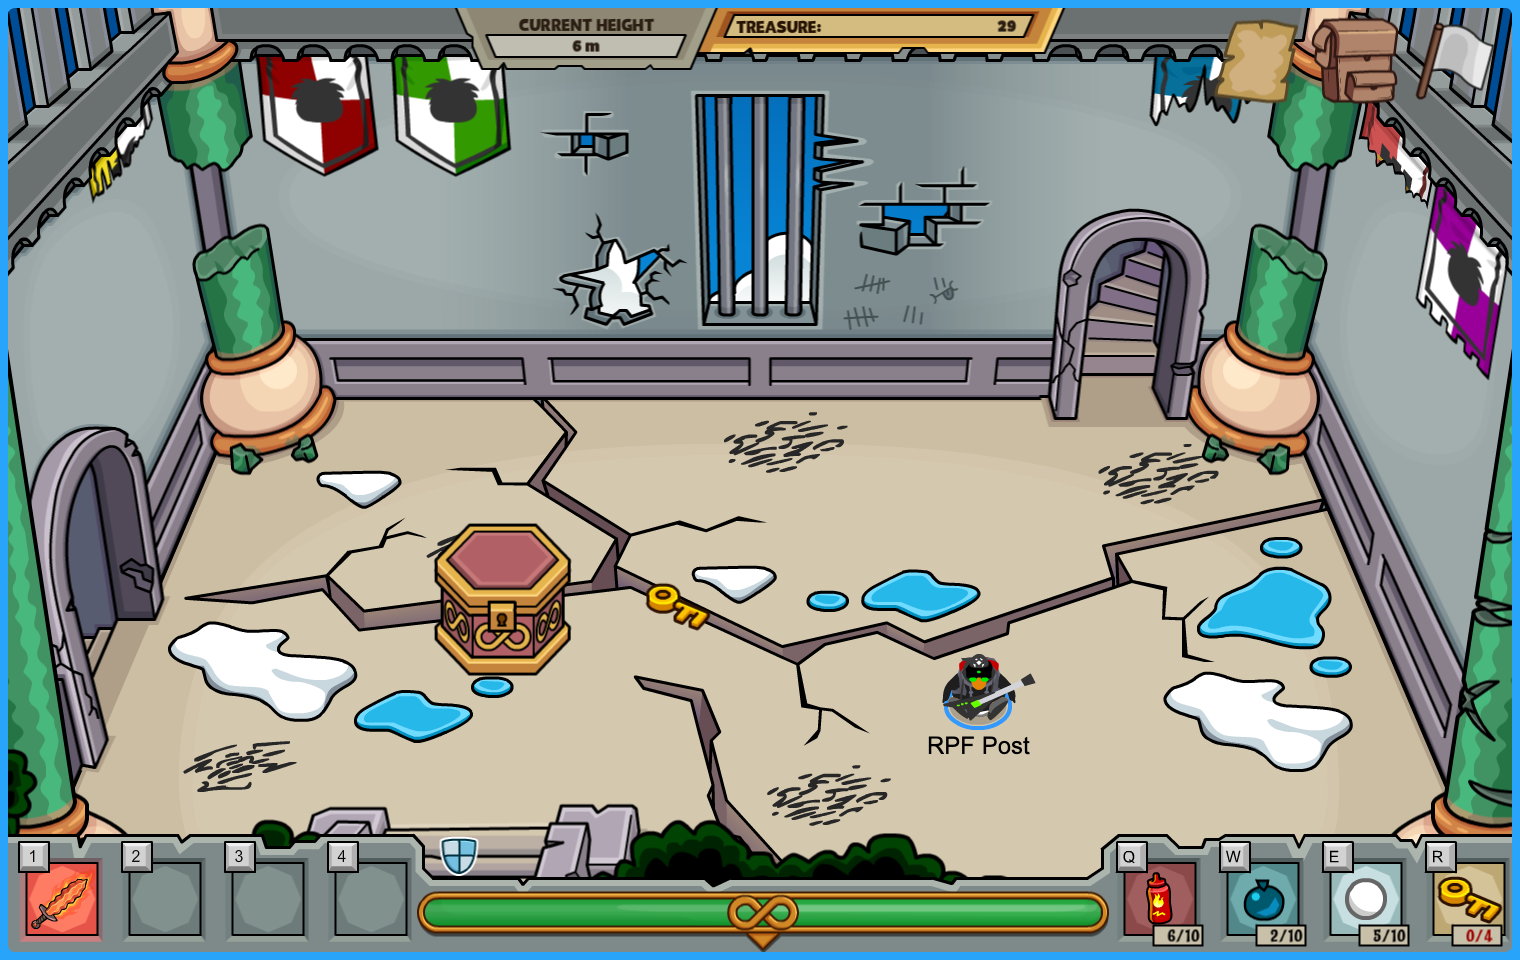
The starting room for the tower is always an empty room with an Artifact Chest, as pictured below.
Using your mouse or trackpad, click to walk over the key to pick it up. Click to walk over to the Artifact Chest, and press the “R” key to unlock it, acquiring your very first Artifact. You can right click here as well to view what your Artifact does. Click and drag the Artifact to add it to one of your item slots. Pro Tip: Even if you have empty slots, make sure to drag each Artifact to a NEW slot or to whichever Artifact you want to replaces a slot – putting an Artifact in slot 1 when it is occupied when slots 2, 3, and 4 are empty will cause you to lose the Artifact that was in that slot. From here, it’s time to start climbing!

There are a few different room types you’ll come across which we’ll go over here. Please note: if ANY room appears to not have an exit, whether that be a staircase or secret room, walk along the perimeter of the walls until you load into another room – this is a known glitch.

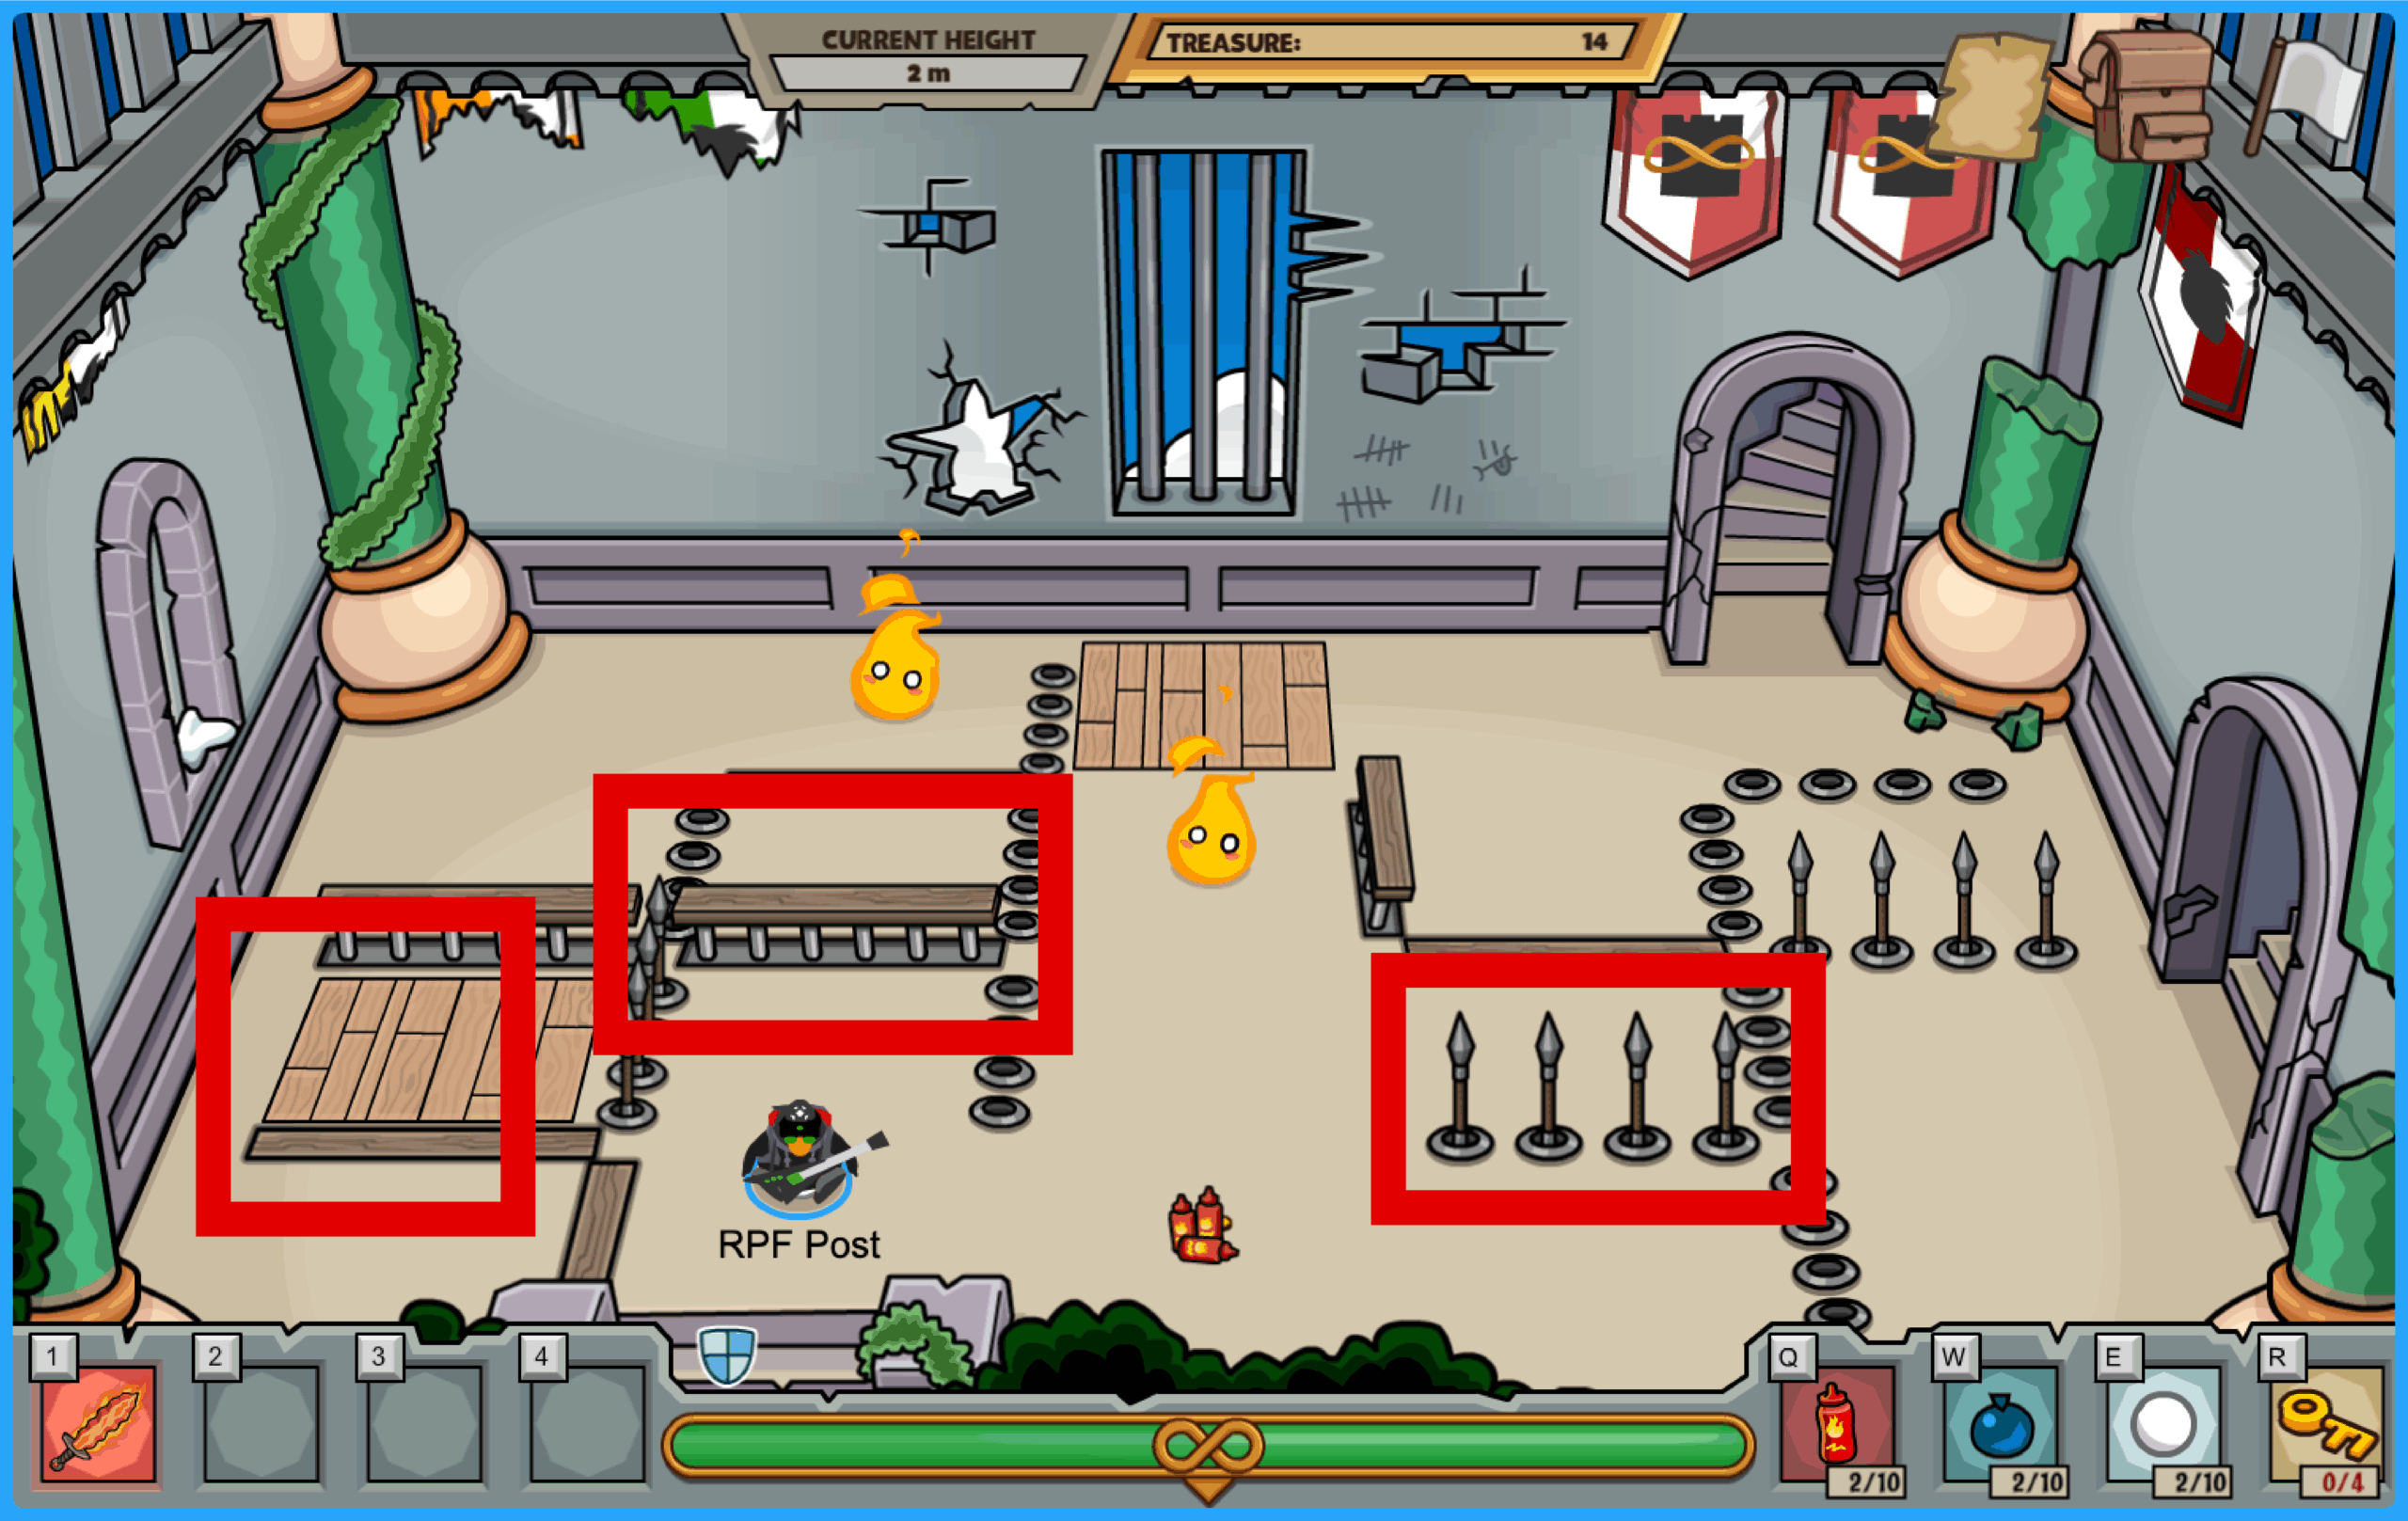
These rooms will have obstacles for you to weave your way through consisting of walls, metal spikes, and trap doors. If you walk over a wall or metal spike when it is down and it suddenly goes up, you will be stuck on it until it moves again, but it won’t deal any damage. Walking over a trap door that is wobbling will cause you to fall down several meters in the tower. Enemies will also spawn, but it is recommended to not waste time beating them, as there are no rewards or drops from them in this type of room.

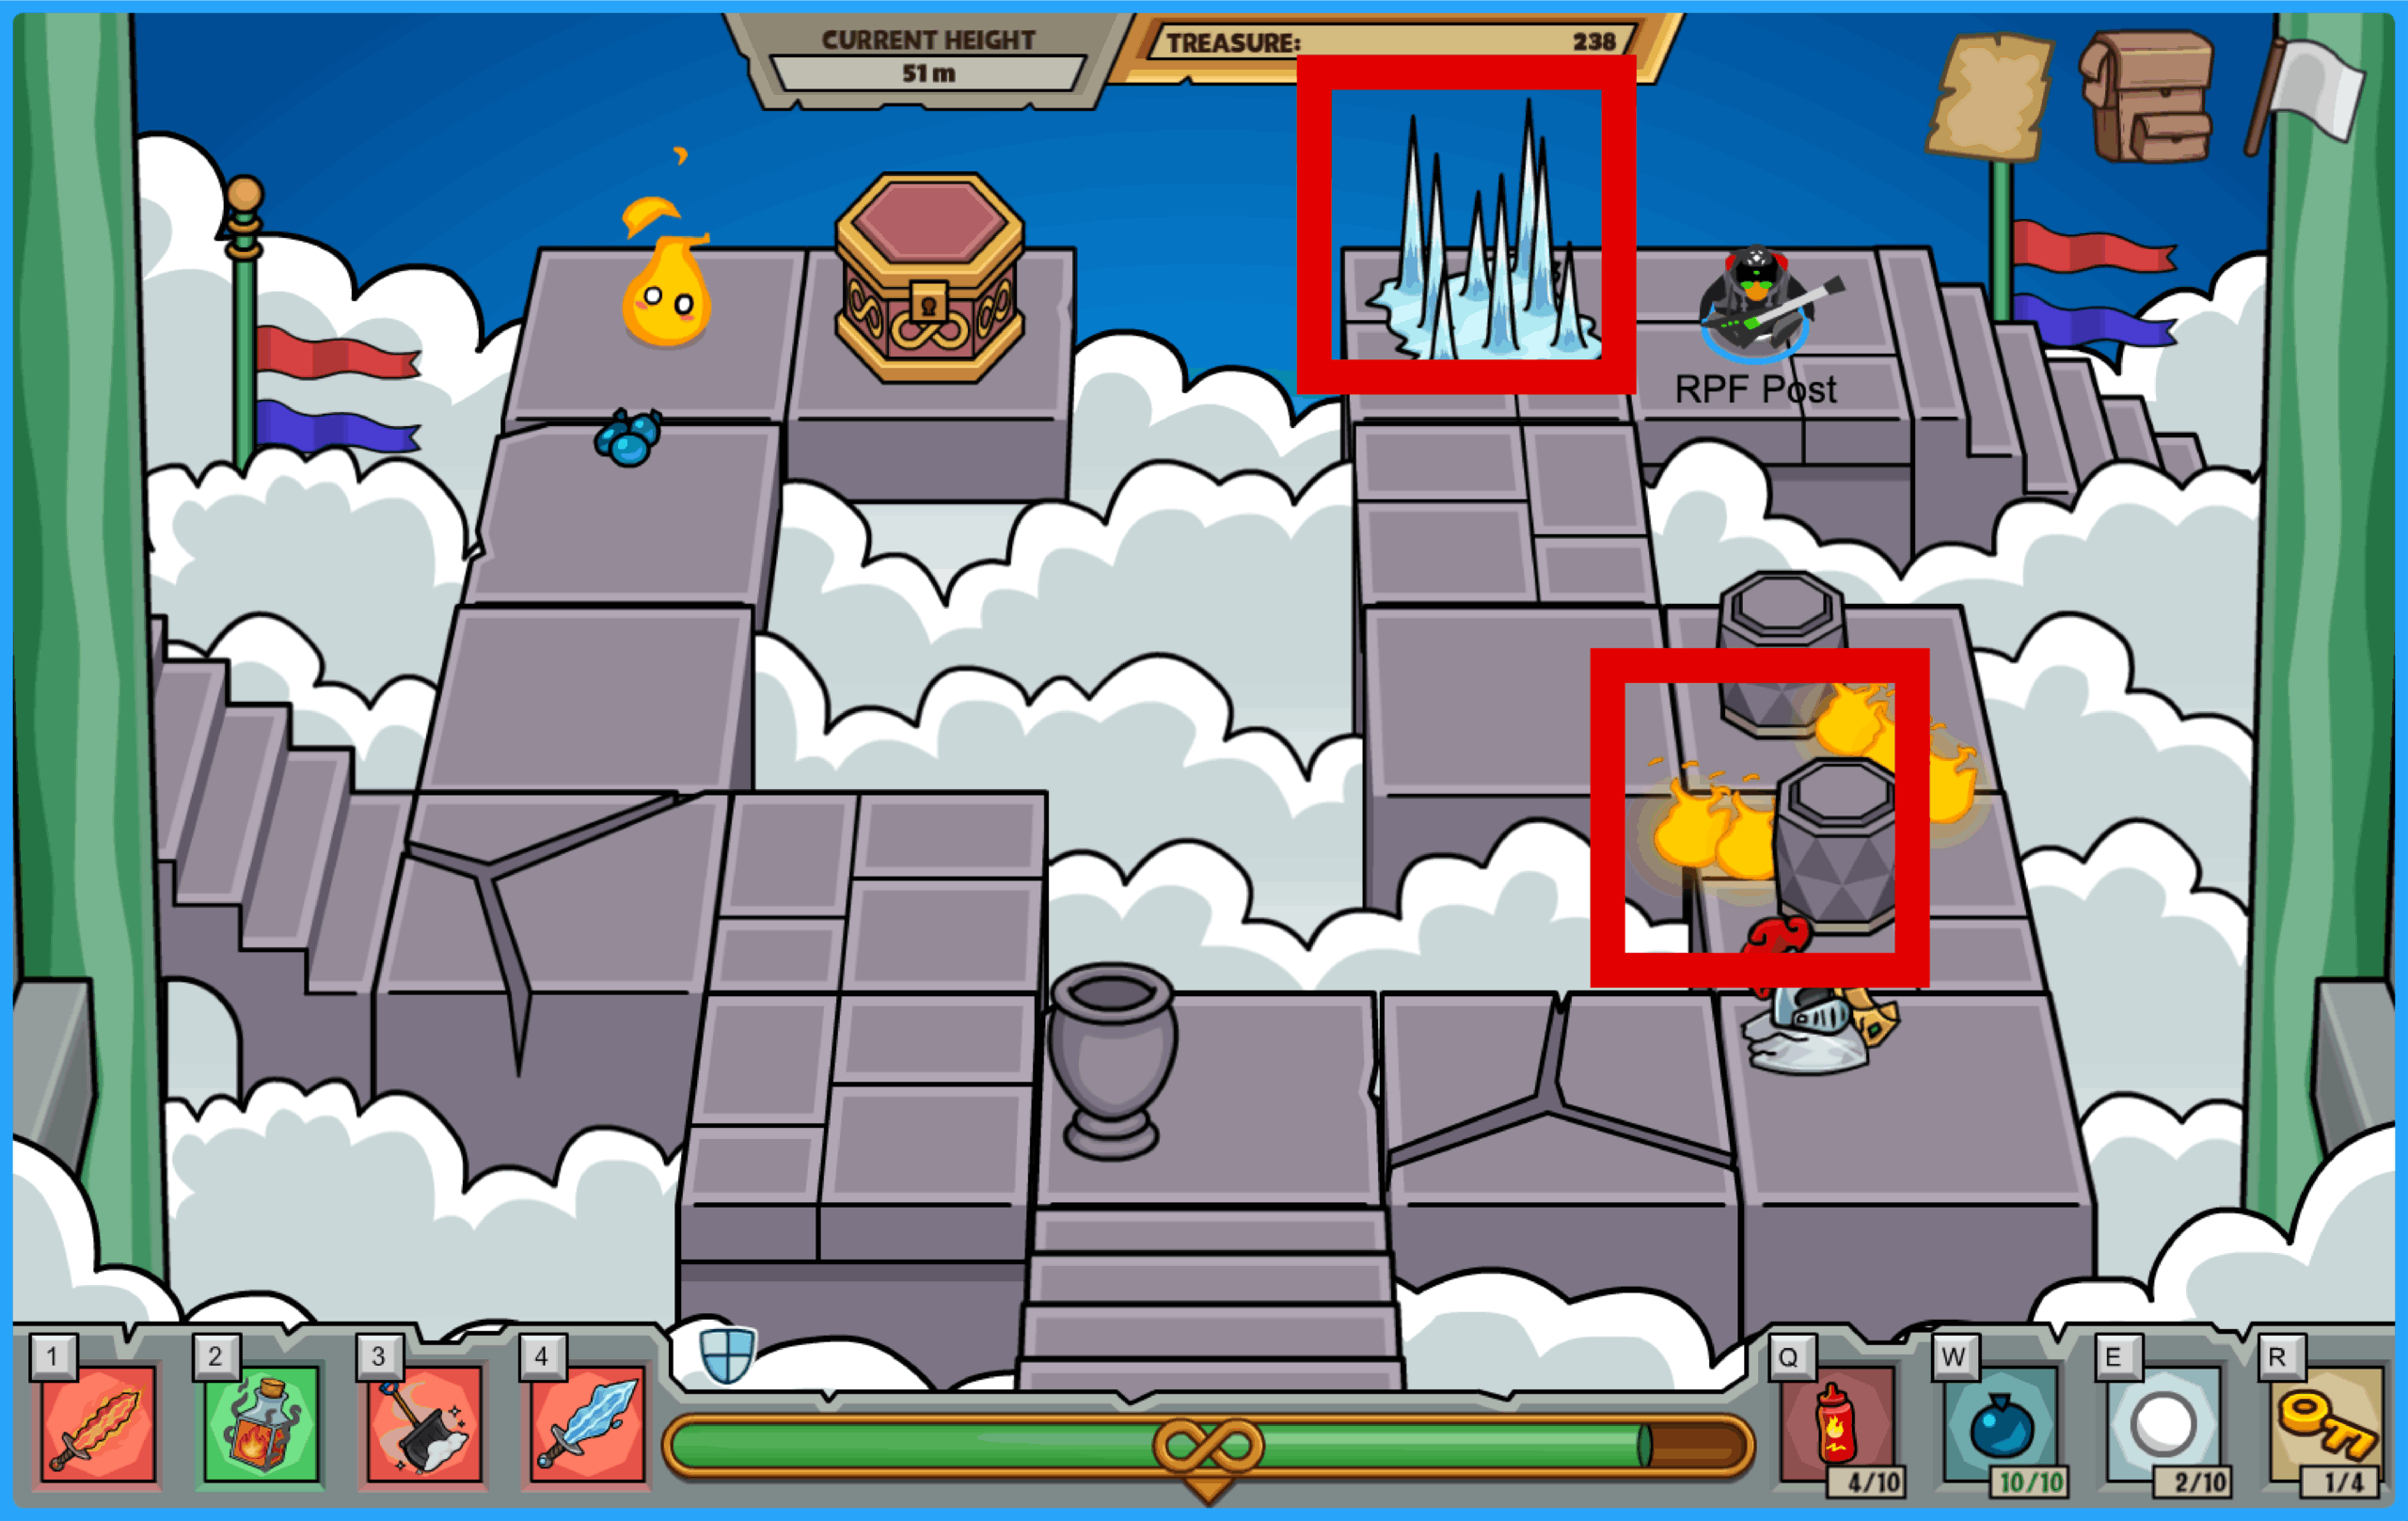
These rooms are accessed by taking the stairs that lead outside of the tower. These will also have obstacles for you to dodge, consisting of ice spikes, fire spinners, and water balloons. Unlike the indoor maze rooms, if you walk over an ice spike when it is down and it suddenly goes up, damage will be dealt to your character. If a flame is touched on a fire spinner or you are hit with a water balloon, it will also deal damage, Enemies will spawn in, but again it is recommended to not waste time beating them, as there are no rewards or drops from them in this type of room.

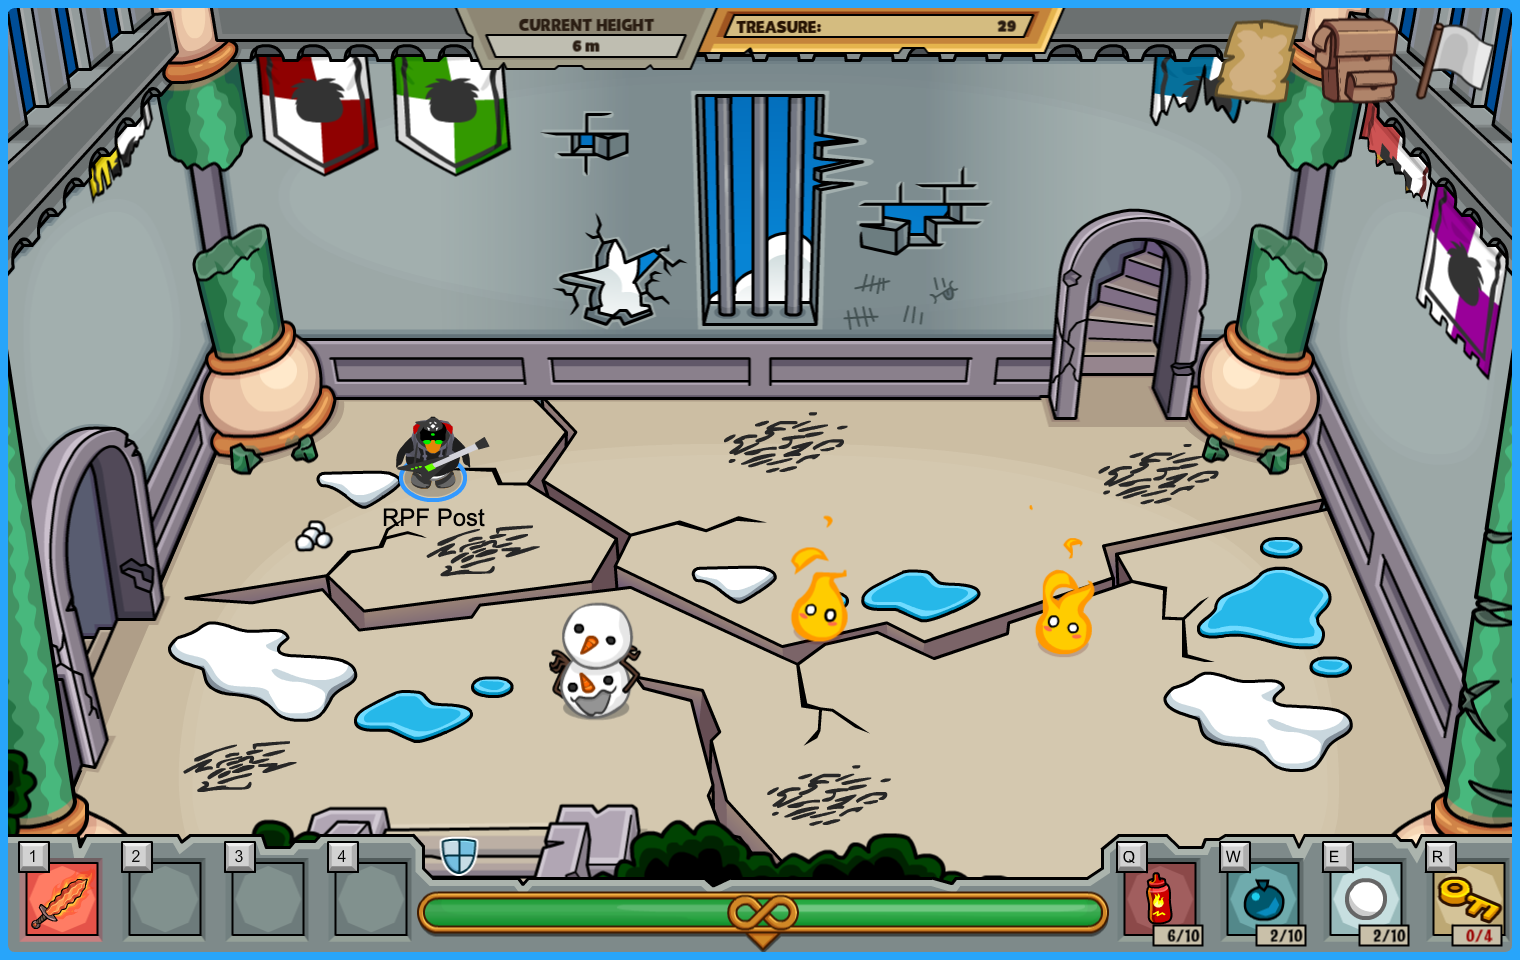
These rooms are empty of everything – except enemies! Defeat these enemies using the combat tips laid out later in the guide, since these enemies will always drop a key and an Artifact chest.

What’s this? A secret room! Look for holes in the the wall and walk into them to enter the secret lair hidden behind them. These rooms will always spawn with 1 free Artifact chest and 1 note – until all 10 notes are found. Once all 10 notes have been collected, the player is allowed to fight Garianna, the boss of the tower, which is covered later in this guide.


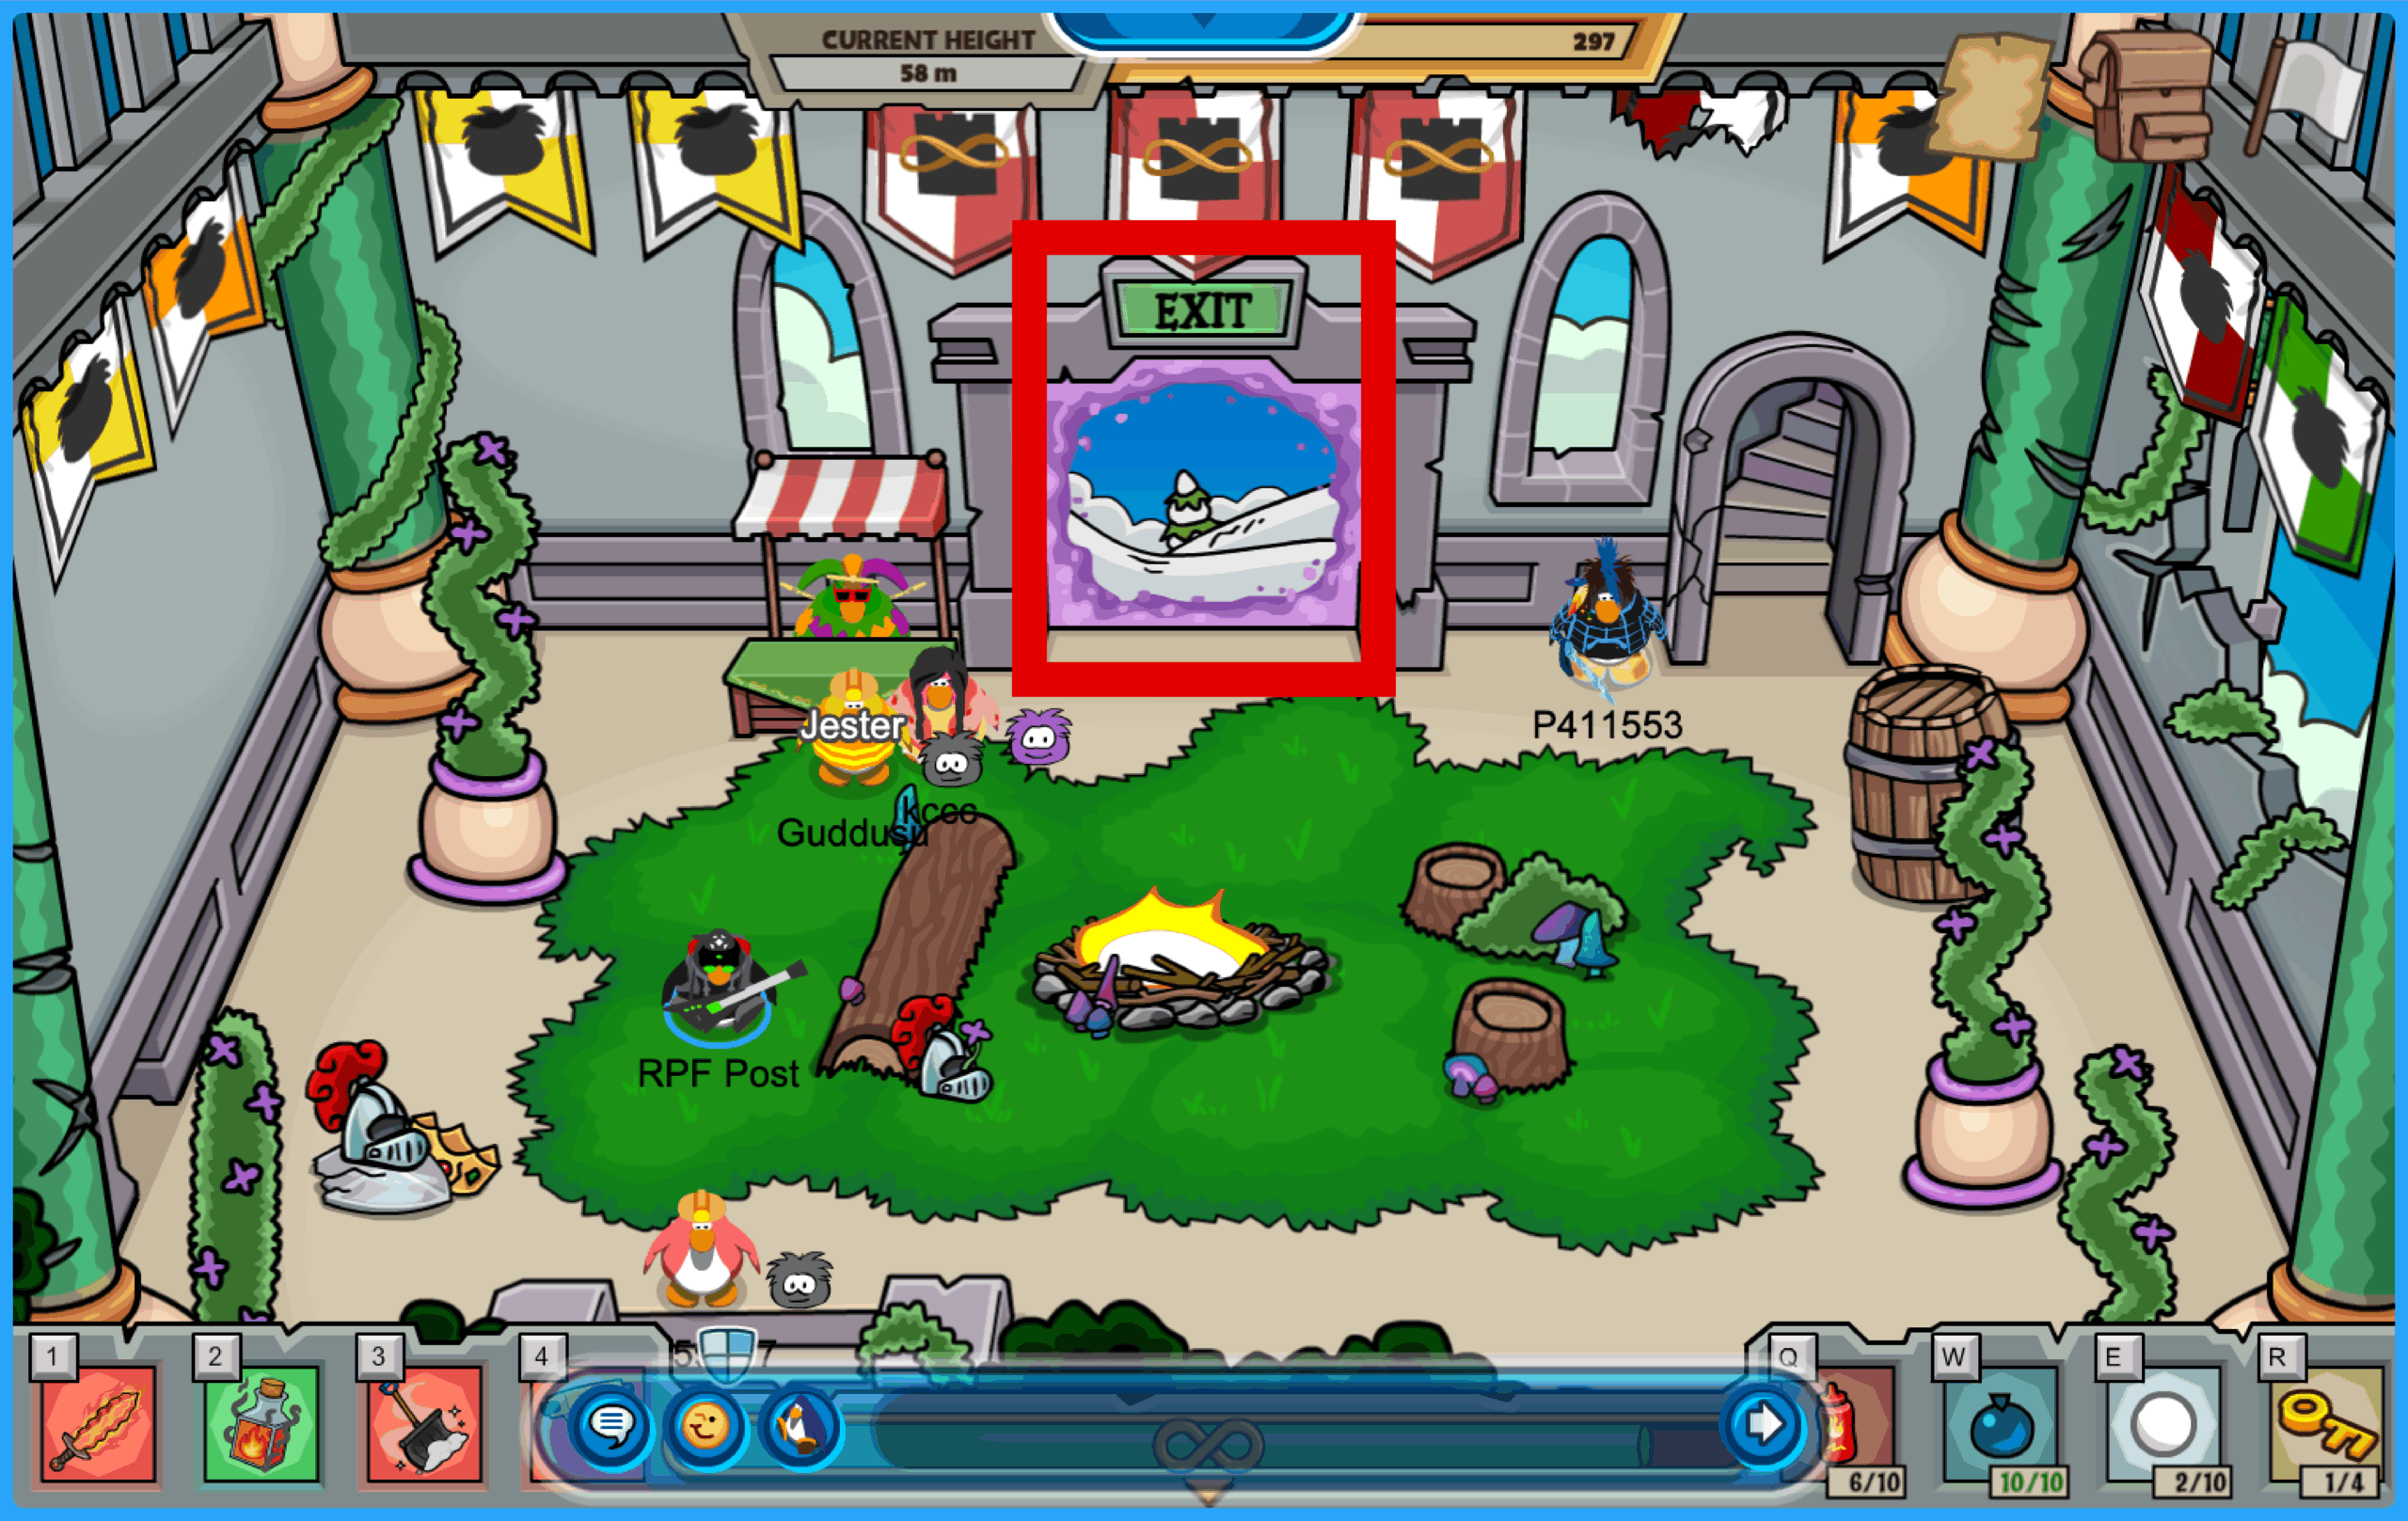
These are rooms where you can mingle with other penguins, shop for Artifacts at the Jester’s Store, and also leave the tower safely. By going through the exit portal you can successfully escape with all of your treasure and a chance to keep your current Artifacts as items.


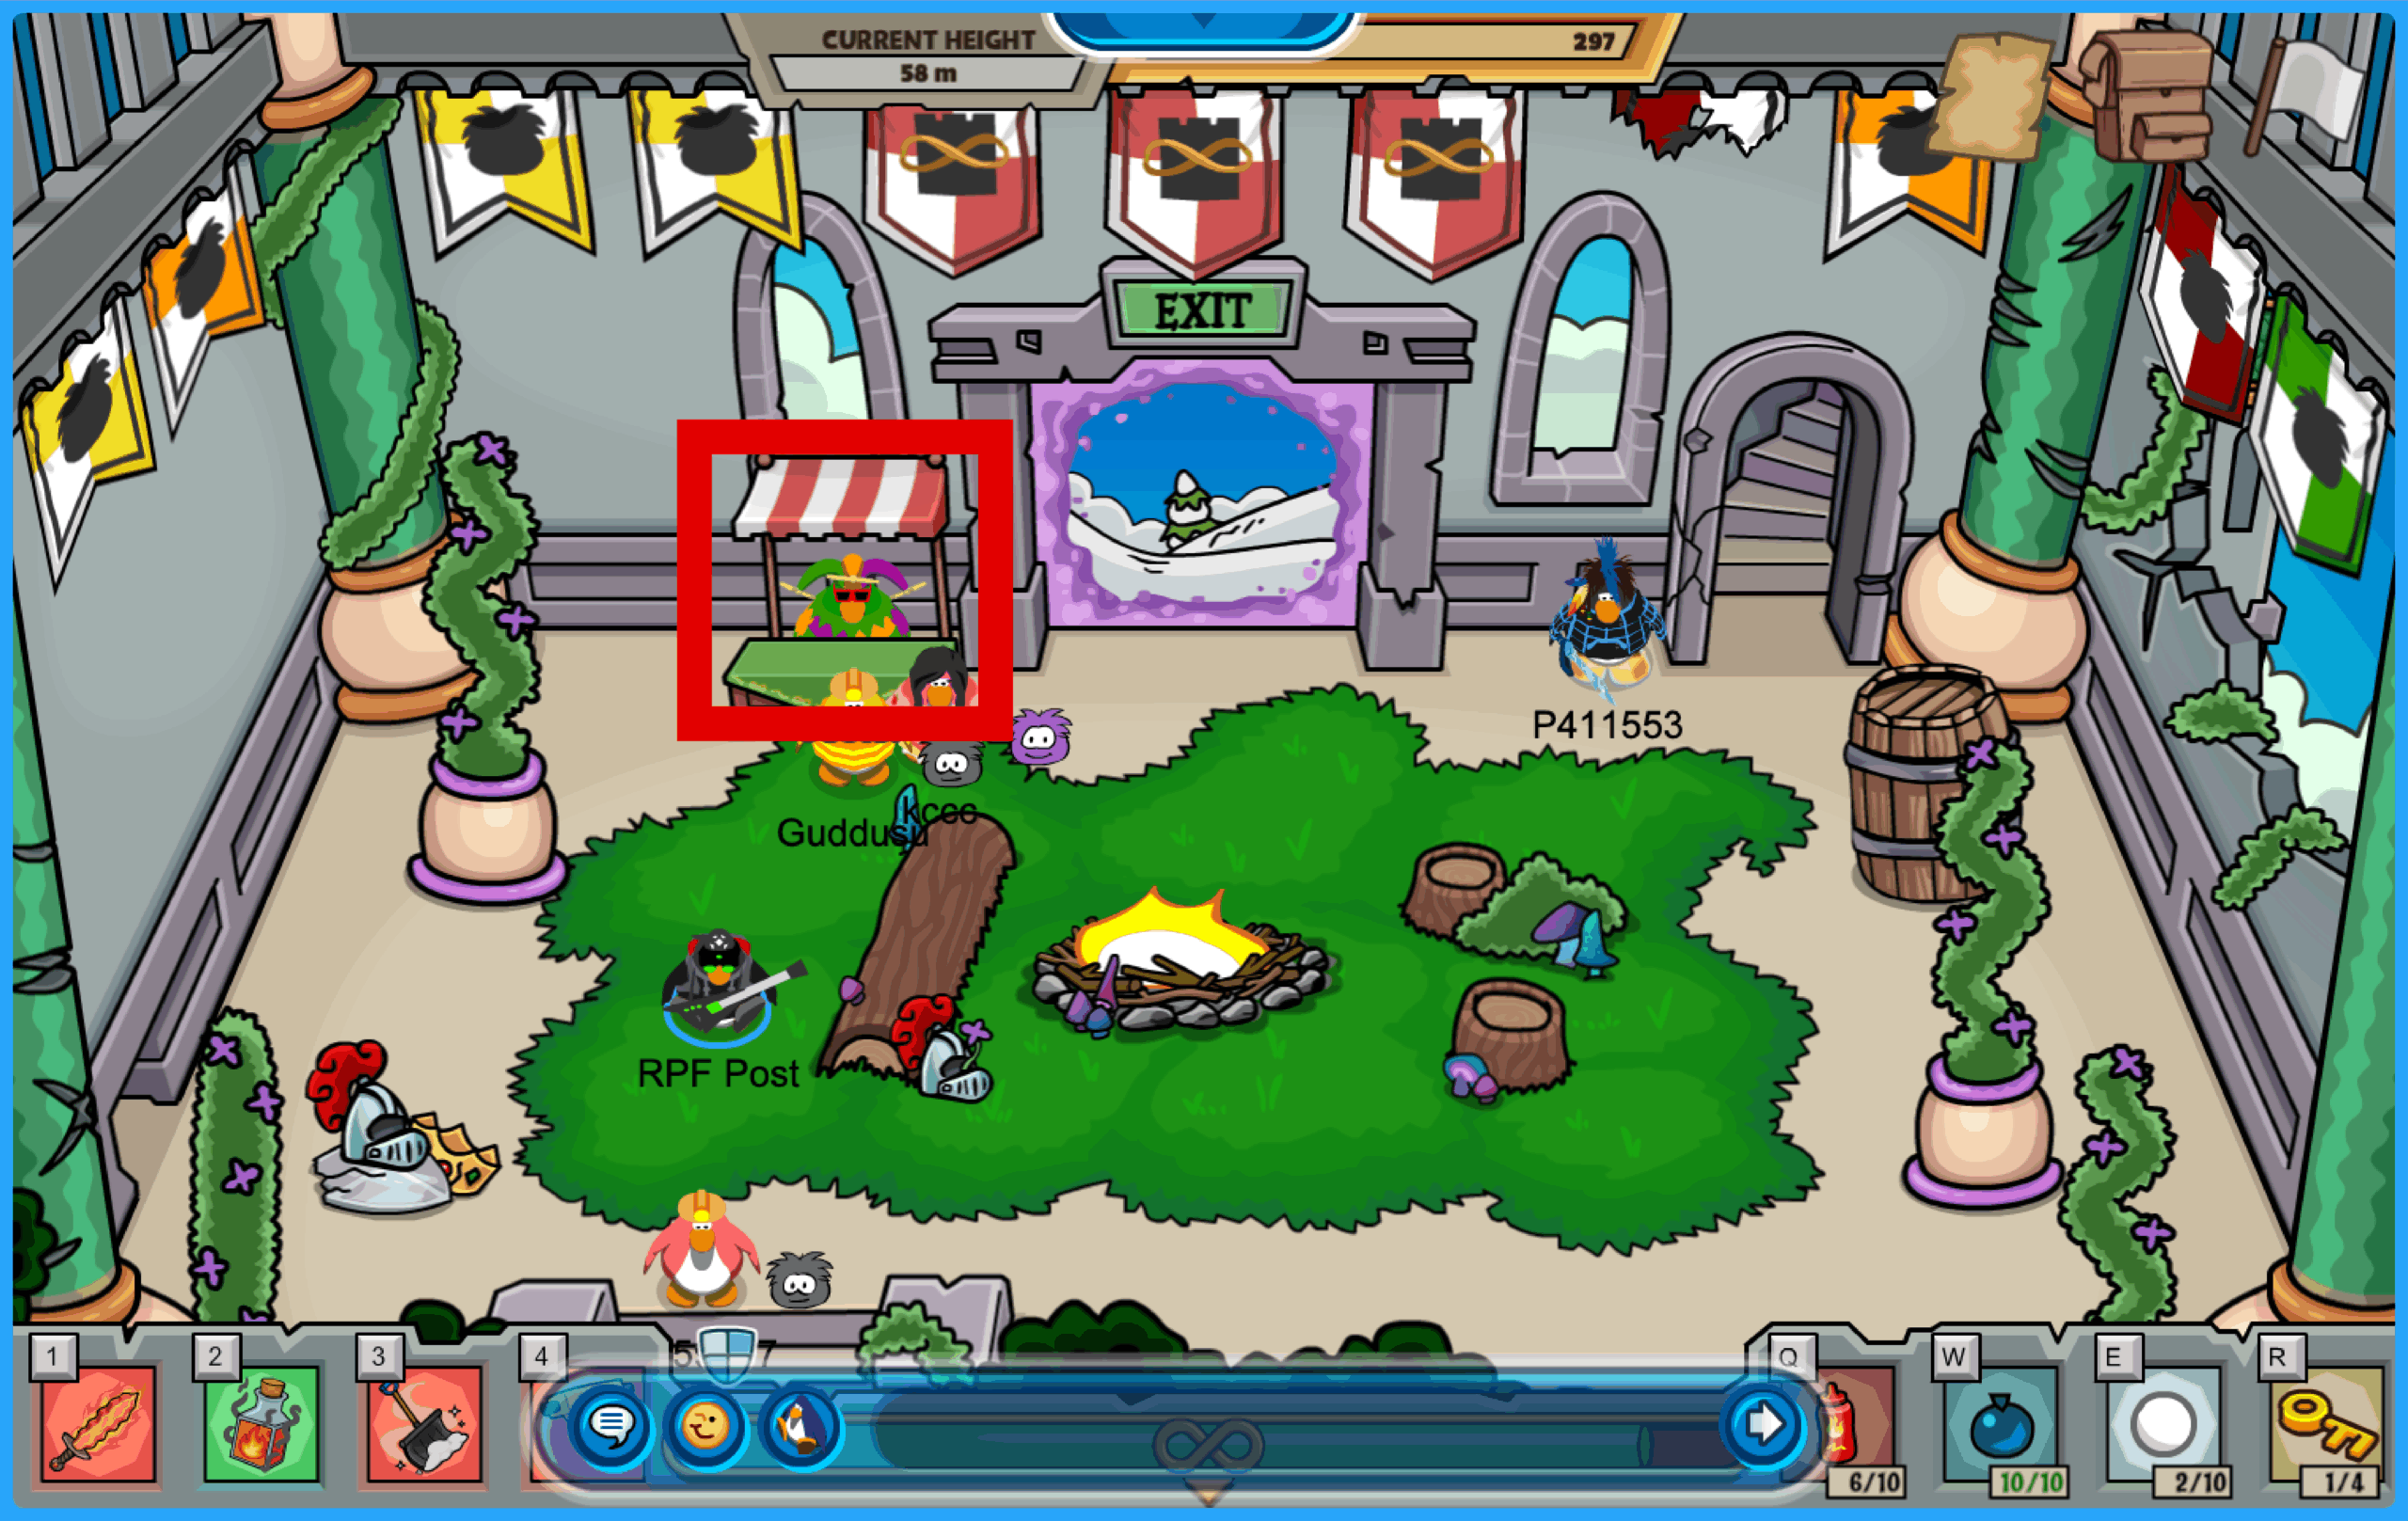
The Jester’s store is only located in break rooms and is run by a penguin who looks shockingly similar to a certain beloved mascot…
Here you can spend your hard earned treasure on items to wear in game and Artifacts to help you climb the Infinite Tower. Every time you go to shop, you will be presented with 3 boxes. There are 4 types of boxes – in game clothing (clothes hanger), weapons (sword), equipment (armor chest plate), and support (potion bottle). The first box will always be a clothing item with the other two boxes being randomized.

The different colors also indicate the different rarities and price of what will be in each box, besides clothing item boxes, which will always be green and will vary in price depending on what item is inside. Note that you can REROLL the boxes as many times as you like to get the exact Artifact you want. After clicking on a box and seeing what is inside, you can choose not to purchase and exit the shop, and then reenter where there will be a new set of 3 items.

Brown – Common – 150 Treasure
Anvil Hammer – 20dmg, 8s cooldown, can stun nearby enemies
Beta Spear (Normal) – 8dmg, 1.5s cooldown, ranged
Beta Spear (Fire) – 8dmg, 1.5s cooldown, ranged
Beta Spear (Water) – 8dmg, 1.5s cooldown, ranged
Beta Spear (Snow) – 8dmg, 1.5s cooldown, ranged
Sword (Normal) – 10dmg, 3s cooldown
Sword (Fire) – 10dmg, 3s cooldown
Sword (Water) – 10dmg, 3s cooldown
Sword (Snow) – 10dmg, 3s cooldown
Ye Puffle O’s – Your puffle can dig up treasure, items or Artifacts, and earns XP from each floor completed
Box Plate Armor (Normal) – +1 Shield
Box Plate Armor (Fire) – +1 Shield
Box Plate Armor (Water) – +1 Shield
Box Plate Armor (Snow) – +1 Shield
Viking Helmet (Normal) – +1 Shield, Enemies take 1 damage when they damage you
Viking Helmet (Fire) – +1 Shield, Enemies take 1 damage when they damage you
Viking Helmet (Water) – +1 Shield, Enemies take 1 damage when they damage you
Viking Helmet (Snow) – +1 Shield, Enemies take 1 damage when they damage you
Haste Potion – +40% movement speed, Can save you from falling off once
Foundation Shield – Gain 2 seconds of invulnerability
Green – Uncommon – 350 Treasure
Ye Hot Cannon – 3dmg, 10s cooldown, ranged
Sir Fluffy – 10dmg, 1s cooldown
Magic Snow Shovel – 12dmg, 4s cooldown, ranged
3D Glasses – Spot secret rooms more easily
Duck Floatie – +1 Shield, Very close enemies bounce back
Ice Cream Apron – +1 Shield, Regenerates health each floor
Patty’s Hat – +1 Shield, Makes you 5% more likely to find Uncommon, Rare, and Legendary Artifacts, and 15% less likely to find Common Artifacts
Welding Mask – +1 Shield, +10% fire damage dealt
Hard Hat (Normal) – +2 Shields
Hard Hat (Fire) – +2 Shields
Hard Hat (Water) – +2 Shields
Hard Hat (Snow) – +2 Shields
Resistance Potion – +4 Shields
Flame in a Bottle – Become fire type for this floor, fire weapons deal 40% more damage
Water Potion – Become water type for this floor, water weapons deal 40% more damage
Snow Potion – Become snow type for this floor, snow weapons deal 40% more damage
Purple – Rare – 475 Treasure
Jackhammer (Normal) – 4dmg, 2s cooldown, can stun nearby enemies
Jackhammer (Fire) – 4dmg, 2s cooldown, can stun nearby enemies
Jackhammer (Water) – 4dmg, 2s cooldown, can stun nearby enemies
Jackhammer (Snow) – 4dmg, 2s cooldown, can stun nearby enemies
Black Belt – Type winning attacks deal 50% more damage
Jetpack – +20% movement speed, +10% damage dealt, Can survive falling off once
Life Ring – +3 Shields when losing HP for the first time on the floor
Pufflescape Ball – +10% movement speed each time you receive damage
Safety Vest – Weapons deal extra points of damage equal to amount of shields
Tiger Cave Toga – Removes all shields, 50% boost to all damage dealt, 1% damage dealt per HP lost in current floor
Fire Blossom – Your weapons deal and additional 20% damage as fire type
Water Lotus – Your weapons deal and additional 20% damage as water type
Snow Rose – Your weapons deal and additional 20% damage as snow type
Magic O’Berry – Your puffle digs for treasure, items, or artifacts. If you safely leave the tower with it, your puffle will level up
Infinite Pizza – Move 10% slower, Heals you slightly
Red – Legendary – 750 Treasure
Cactus – 8dmg, 3s cooldown
Ninja Mask – Enemies won’t attack you until you attack them
Wizard Hat (Normal) – +1 Shield, Reduces floor cooldown on Support Artifacts by 1
Wizard Hat (Fire) – +1 Shield, Reduces floor cooldown on Support Artifacts by 1
Wizard Hat (Water) – +1 Shield, Reduces floor cooldown on Support Artifacts by 1
Wizard Hat (Snow) – +1 Shield, Reduces floor cooldown on Support Artifacts by 1
Mega Dragon Potion – +3 Shields, Transforms you into the Mega Dragon, Can’t fall off any floors
If you successfully exit with them, the Anvil Hammer, Sir Fluffy, Ye Hot Cannon, all Swords, all Beta Spears, all Jackhammers, and the Cactus can all be taken out of the tower and be worn as in game clothing items.

As mentioned, these will always be in a green box, and cost is dependent on the item. Make sure to collect them all!
Apprentice Hat – 250 Treasure
Black Noble Steed – 250 Treasure
Blue Hydra Costume – 550 Treasure
Blue Hydra Feet – 350 Treasure
Bow and Arrows – 250 Treasure
Chestnut Noble Steed – 250 Treasure
Dark Brown Noble Steed – 250 Treasure
Dragon King Costume – 1000 Treasure
Dragon King Feet – 550 Treasure
Dragon Pet – 1000 Treasure
Dragon Wing Helmet – 350 Treasure
Emerald Staff – 350 Treasure
Emerald Wizard Hat – 250 Treasure
Emerald Wizard Robe – 250 Treasure
Enchanted Wings – 550 Treasure
Magic Potion – 250 Treasure
Magic Staff – 550 Treasure
Magical Book – 250 Treasure
Magical Wand – 350 Treasure
Medieval Cloak – 1000 Treasure
Red Hydra Costume – 550 Treasure
Red Hydra Feet – 250 Treasure
Rogue’s Cloak – 550 Treasure
Rouge’s Rapier – 350 Treasure
Rouge’s Tunic – 550 Treasure
Scorn Crown – 350 Treasure
Scorn Dragon Pet – 1000 Treasure
Scorn Robe – 550 Treasure
Staff of Wonder – 350 Treasure
Staff of Wonder – 350 Treasure
Sword of Virtue – 1000 Treasure
White Noble Steed – 250 Treasure
Wizardly Hat – 550 Treasure
Wizardly Jacket – 350 Treasure

There are three types of elemental enemies that you’ll encounter, who can be defeated by throwing hot sauce, water balloons, or snowballs at them or using Weapon Artifacts. You deal 10 HP with an element that is strong against the enemy, 5 HP with the same element, and 2 HP with a weak element. Each enemy has 20 HP. The elements work the same as Card Jitsu, where Fire beats Snow, Snow beats Water, and Water Beats Fire.


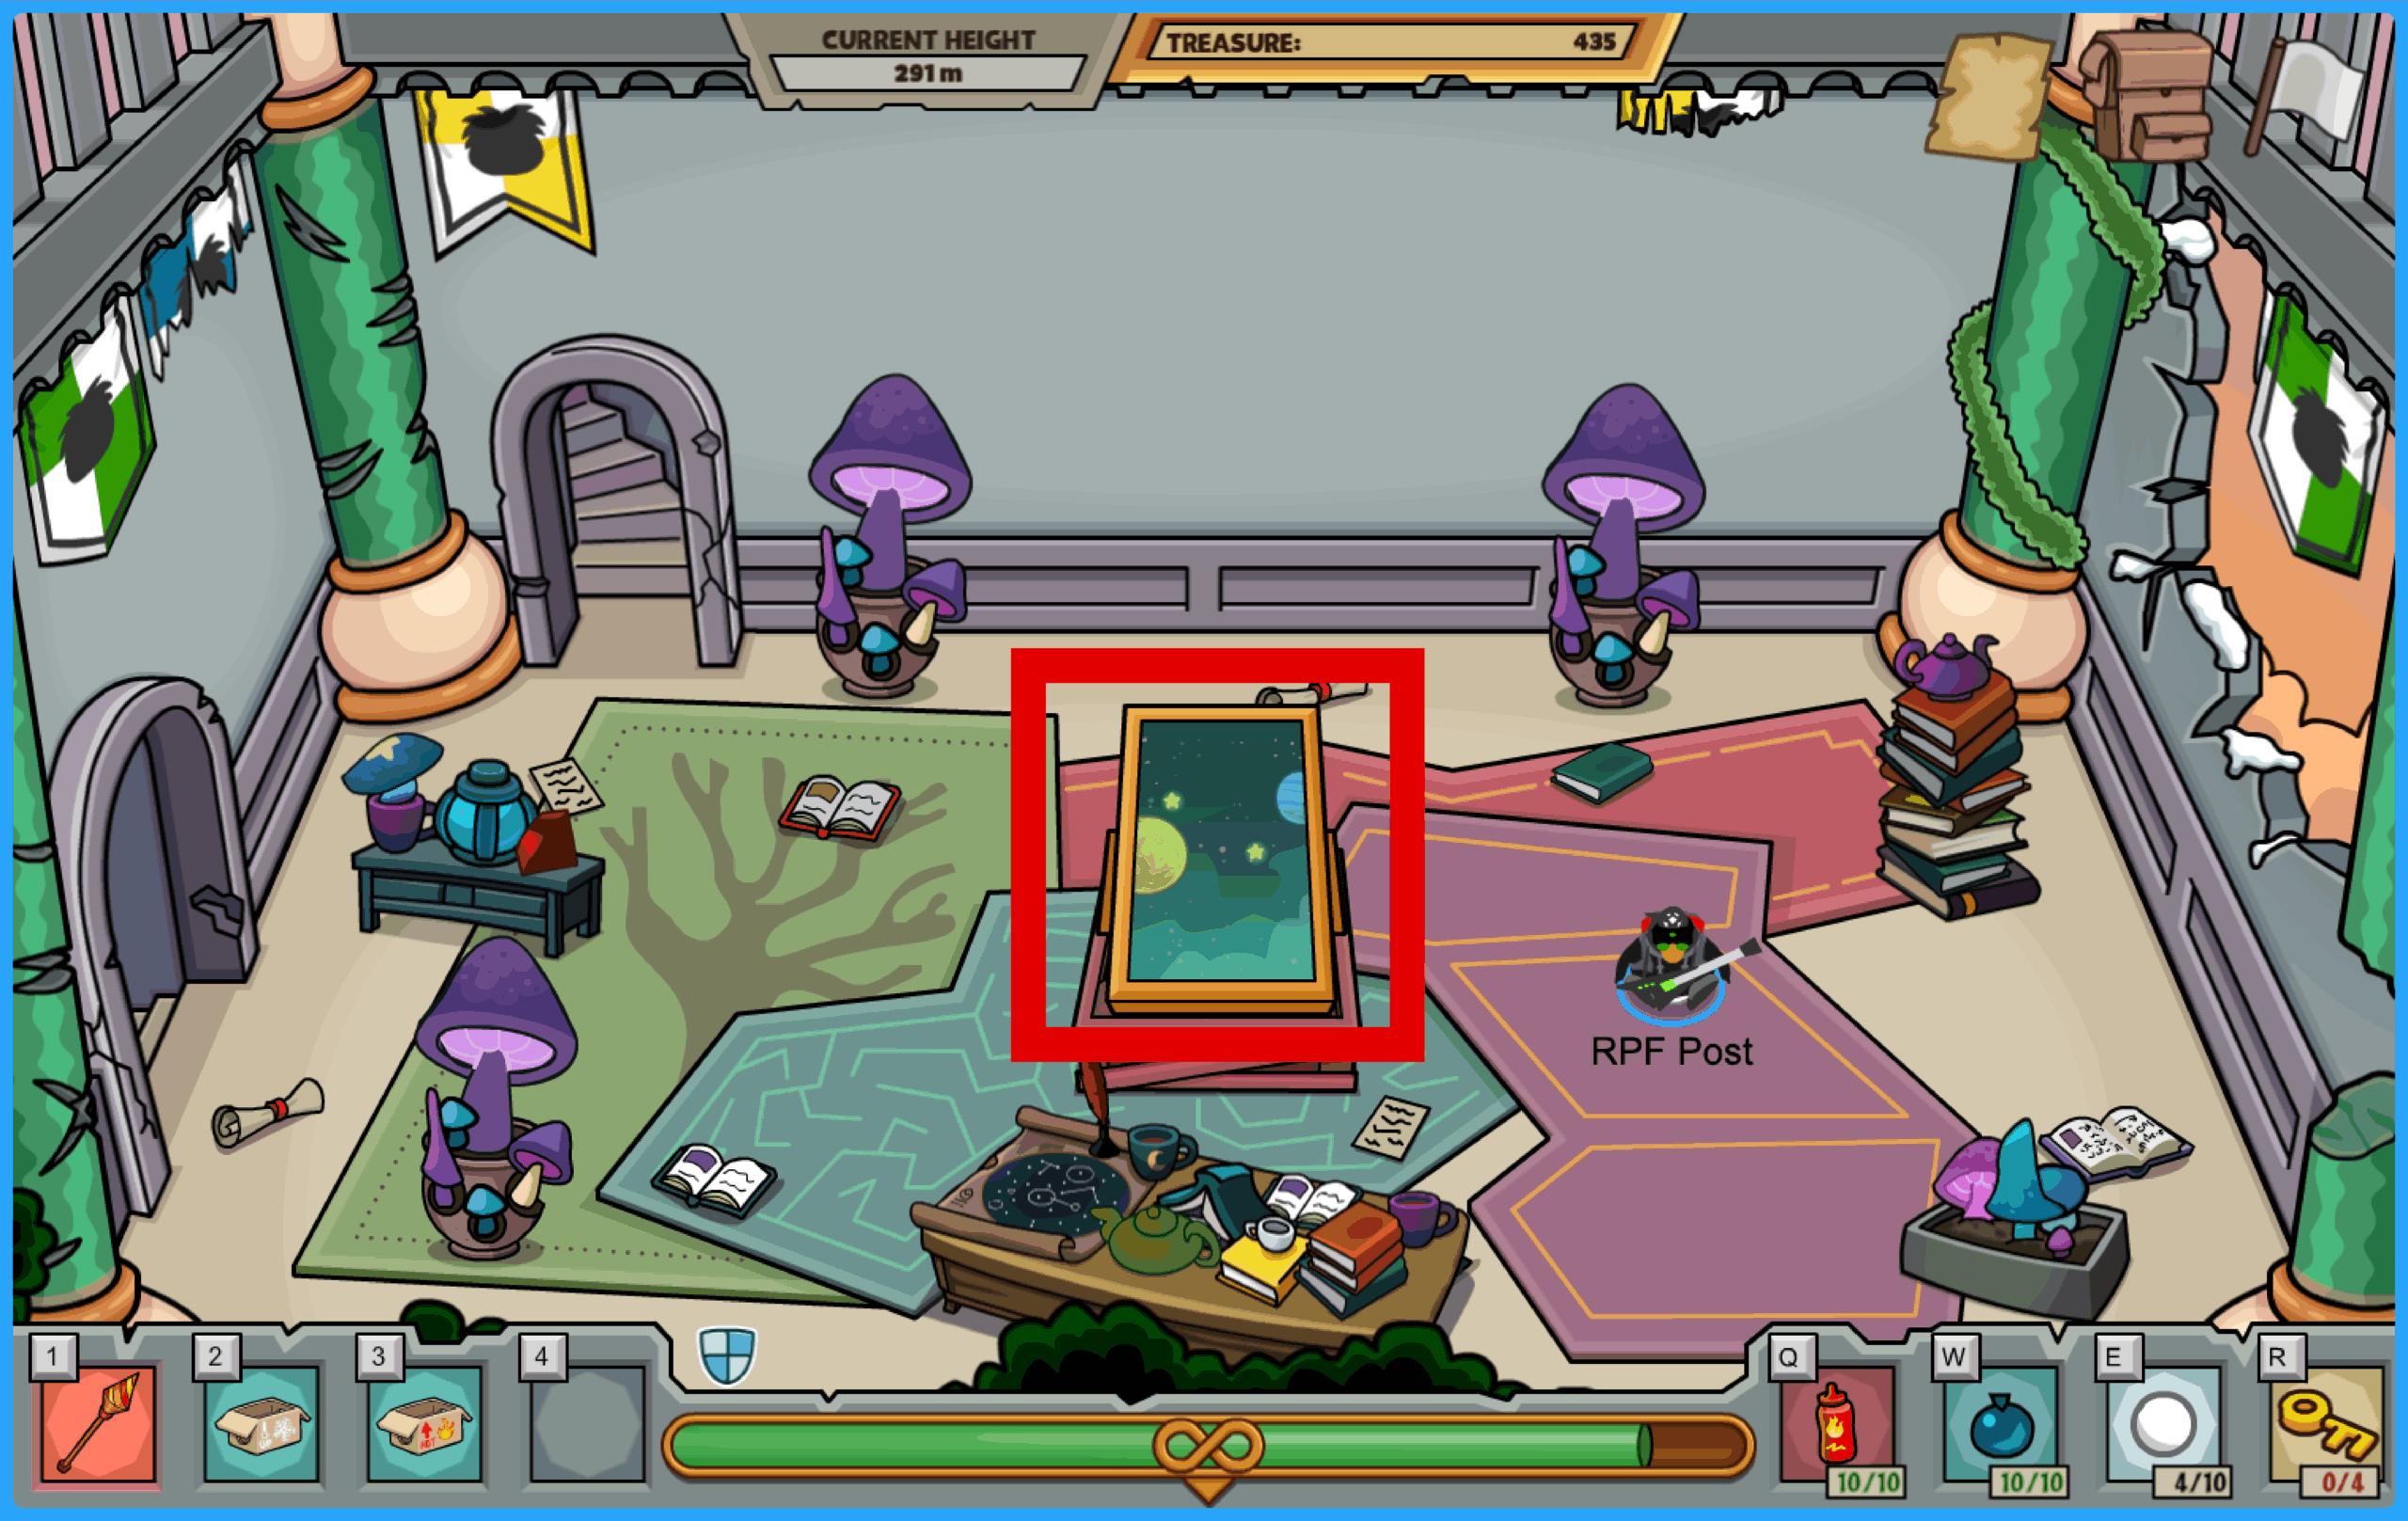
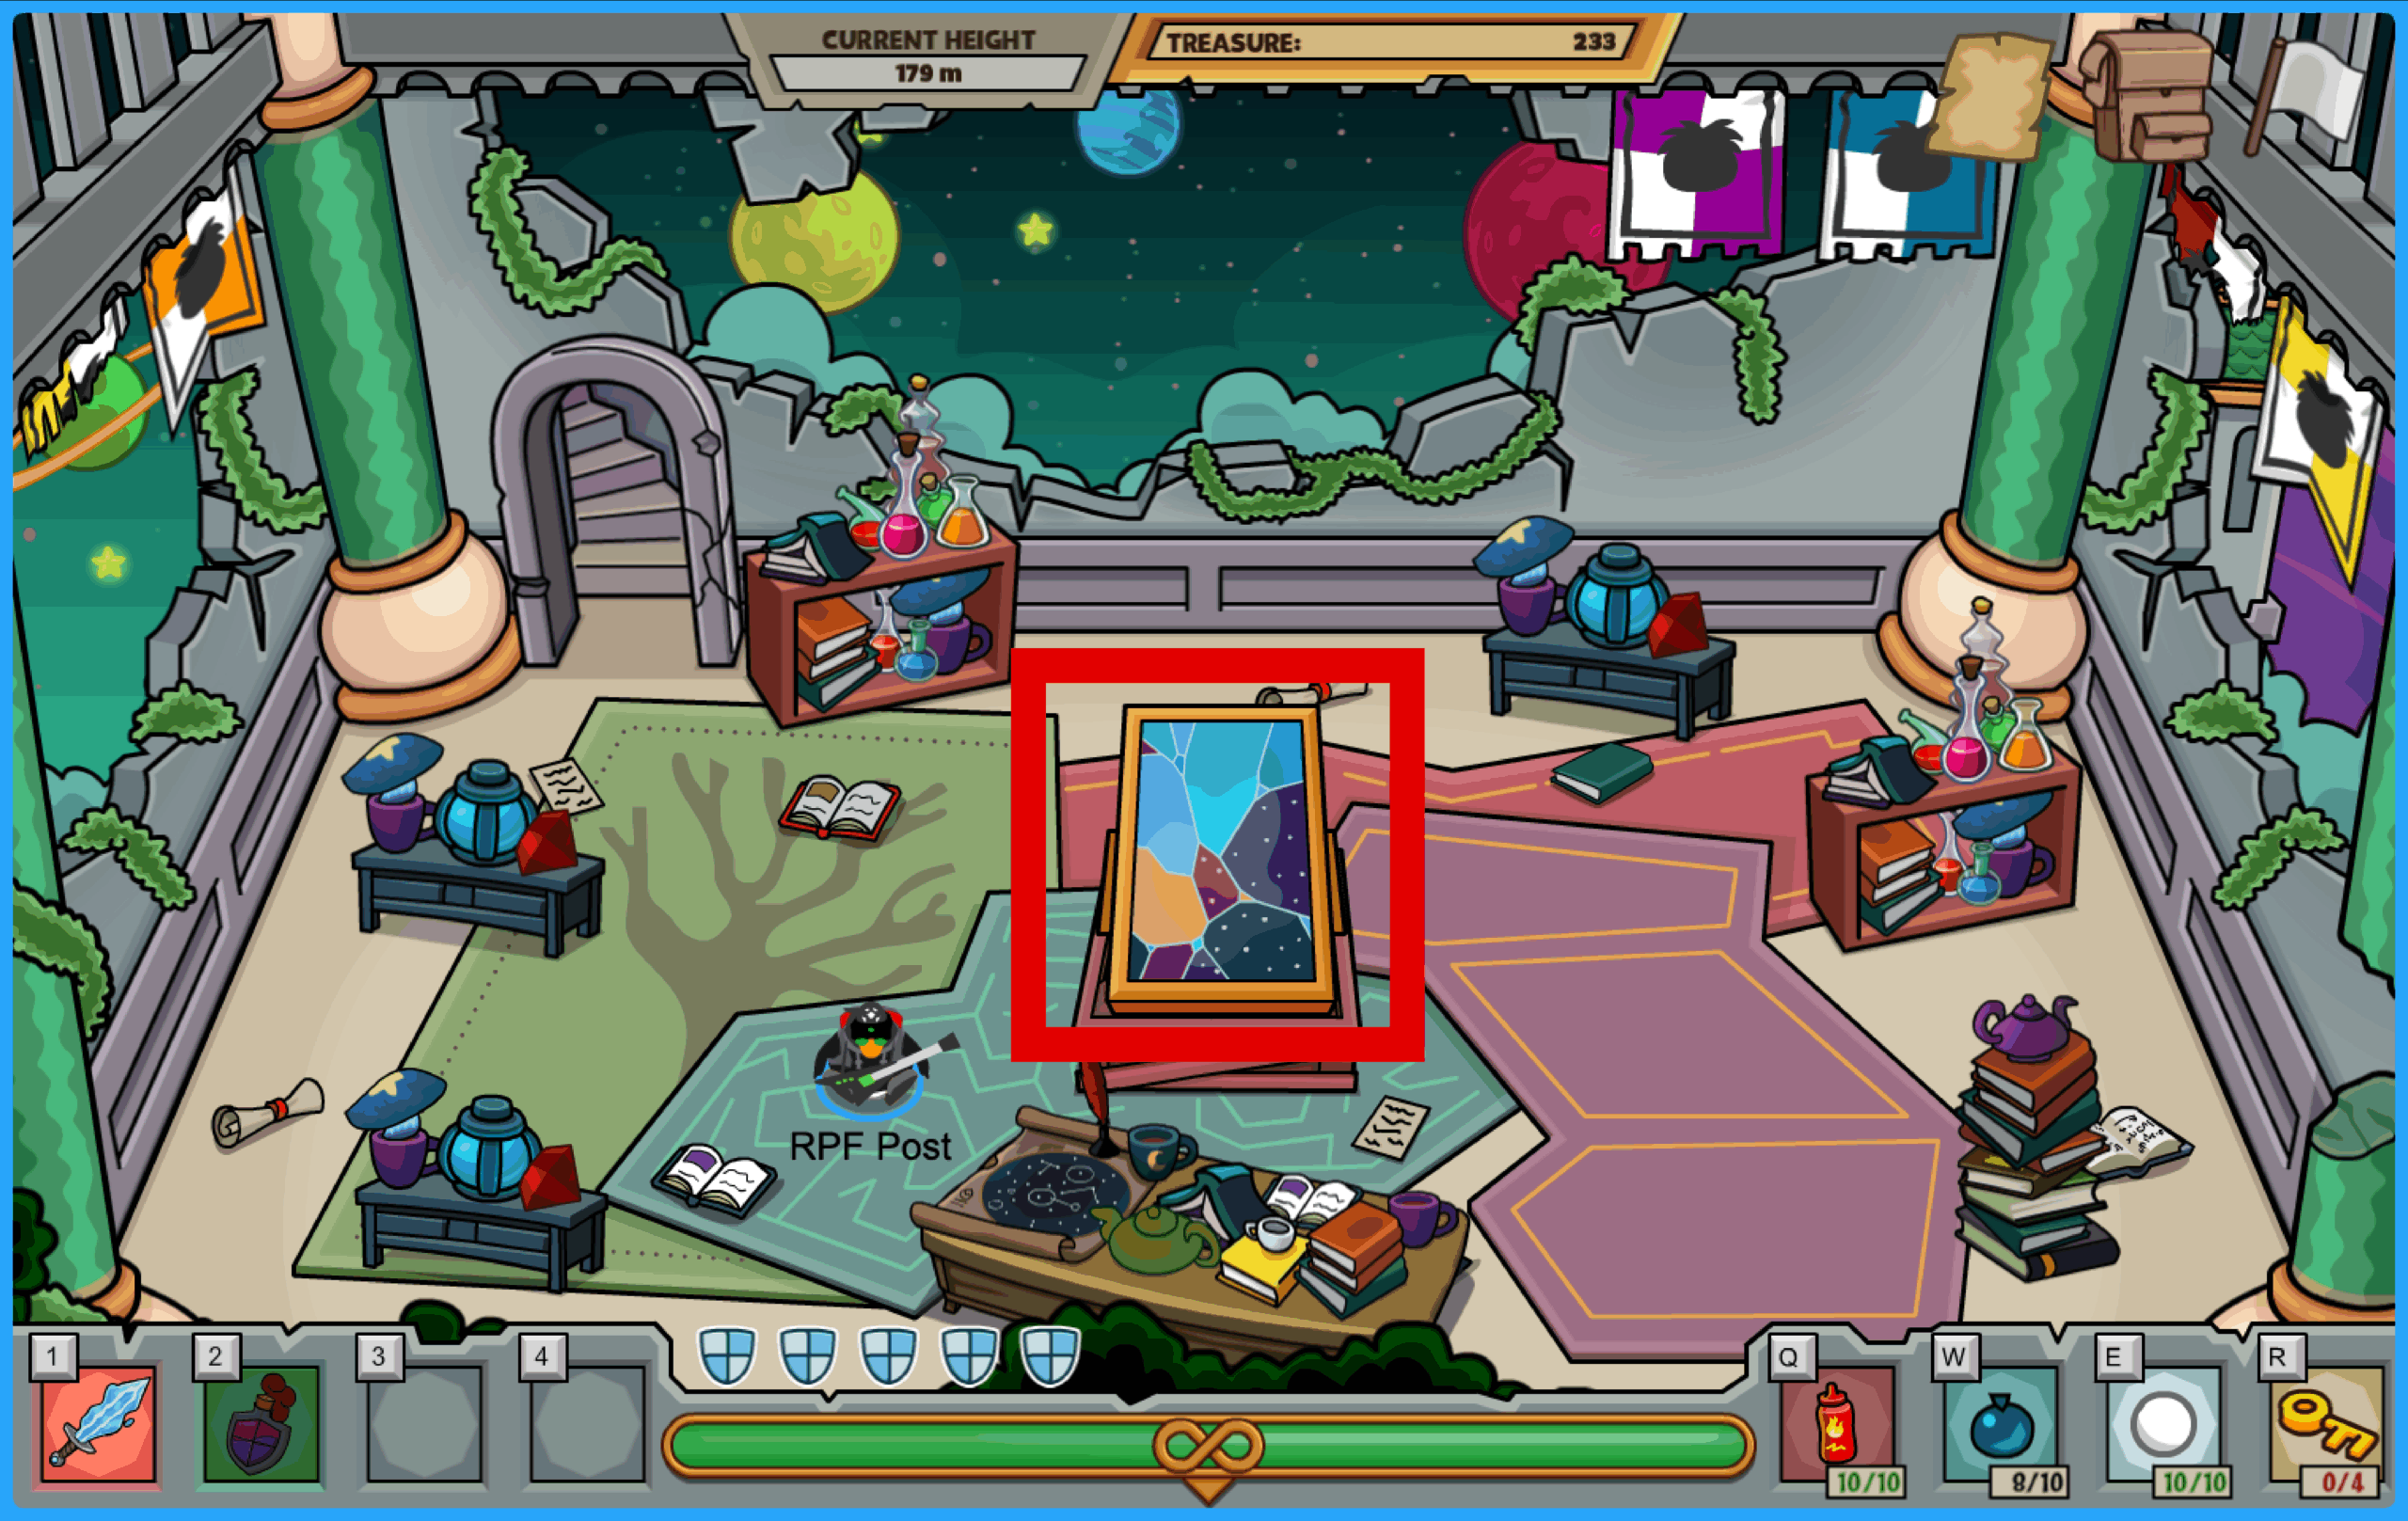
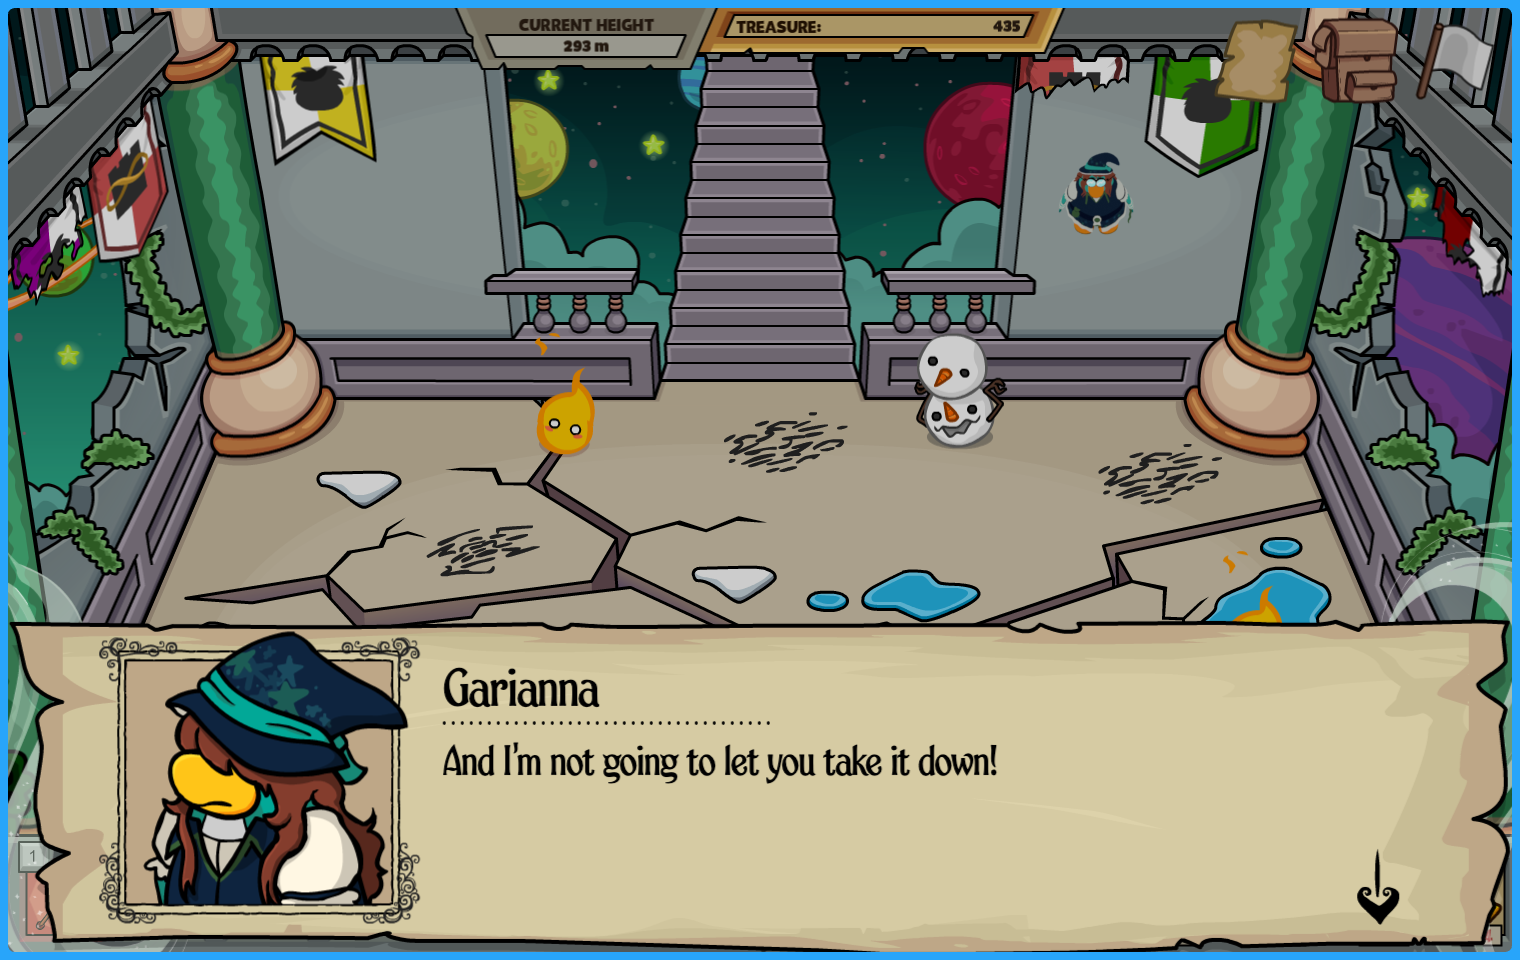
After collecting all 10 notes from 10 separate secret rooms and learning the origins of the Infinite Tower, the next time you enter a secret room the boss battle against Garianna will be initiated. Interact with the mirror in the center of the room which will play a small cutscene.
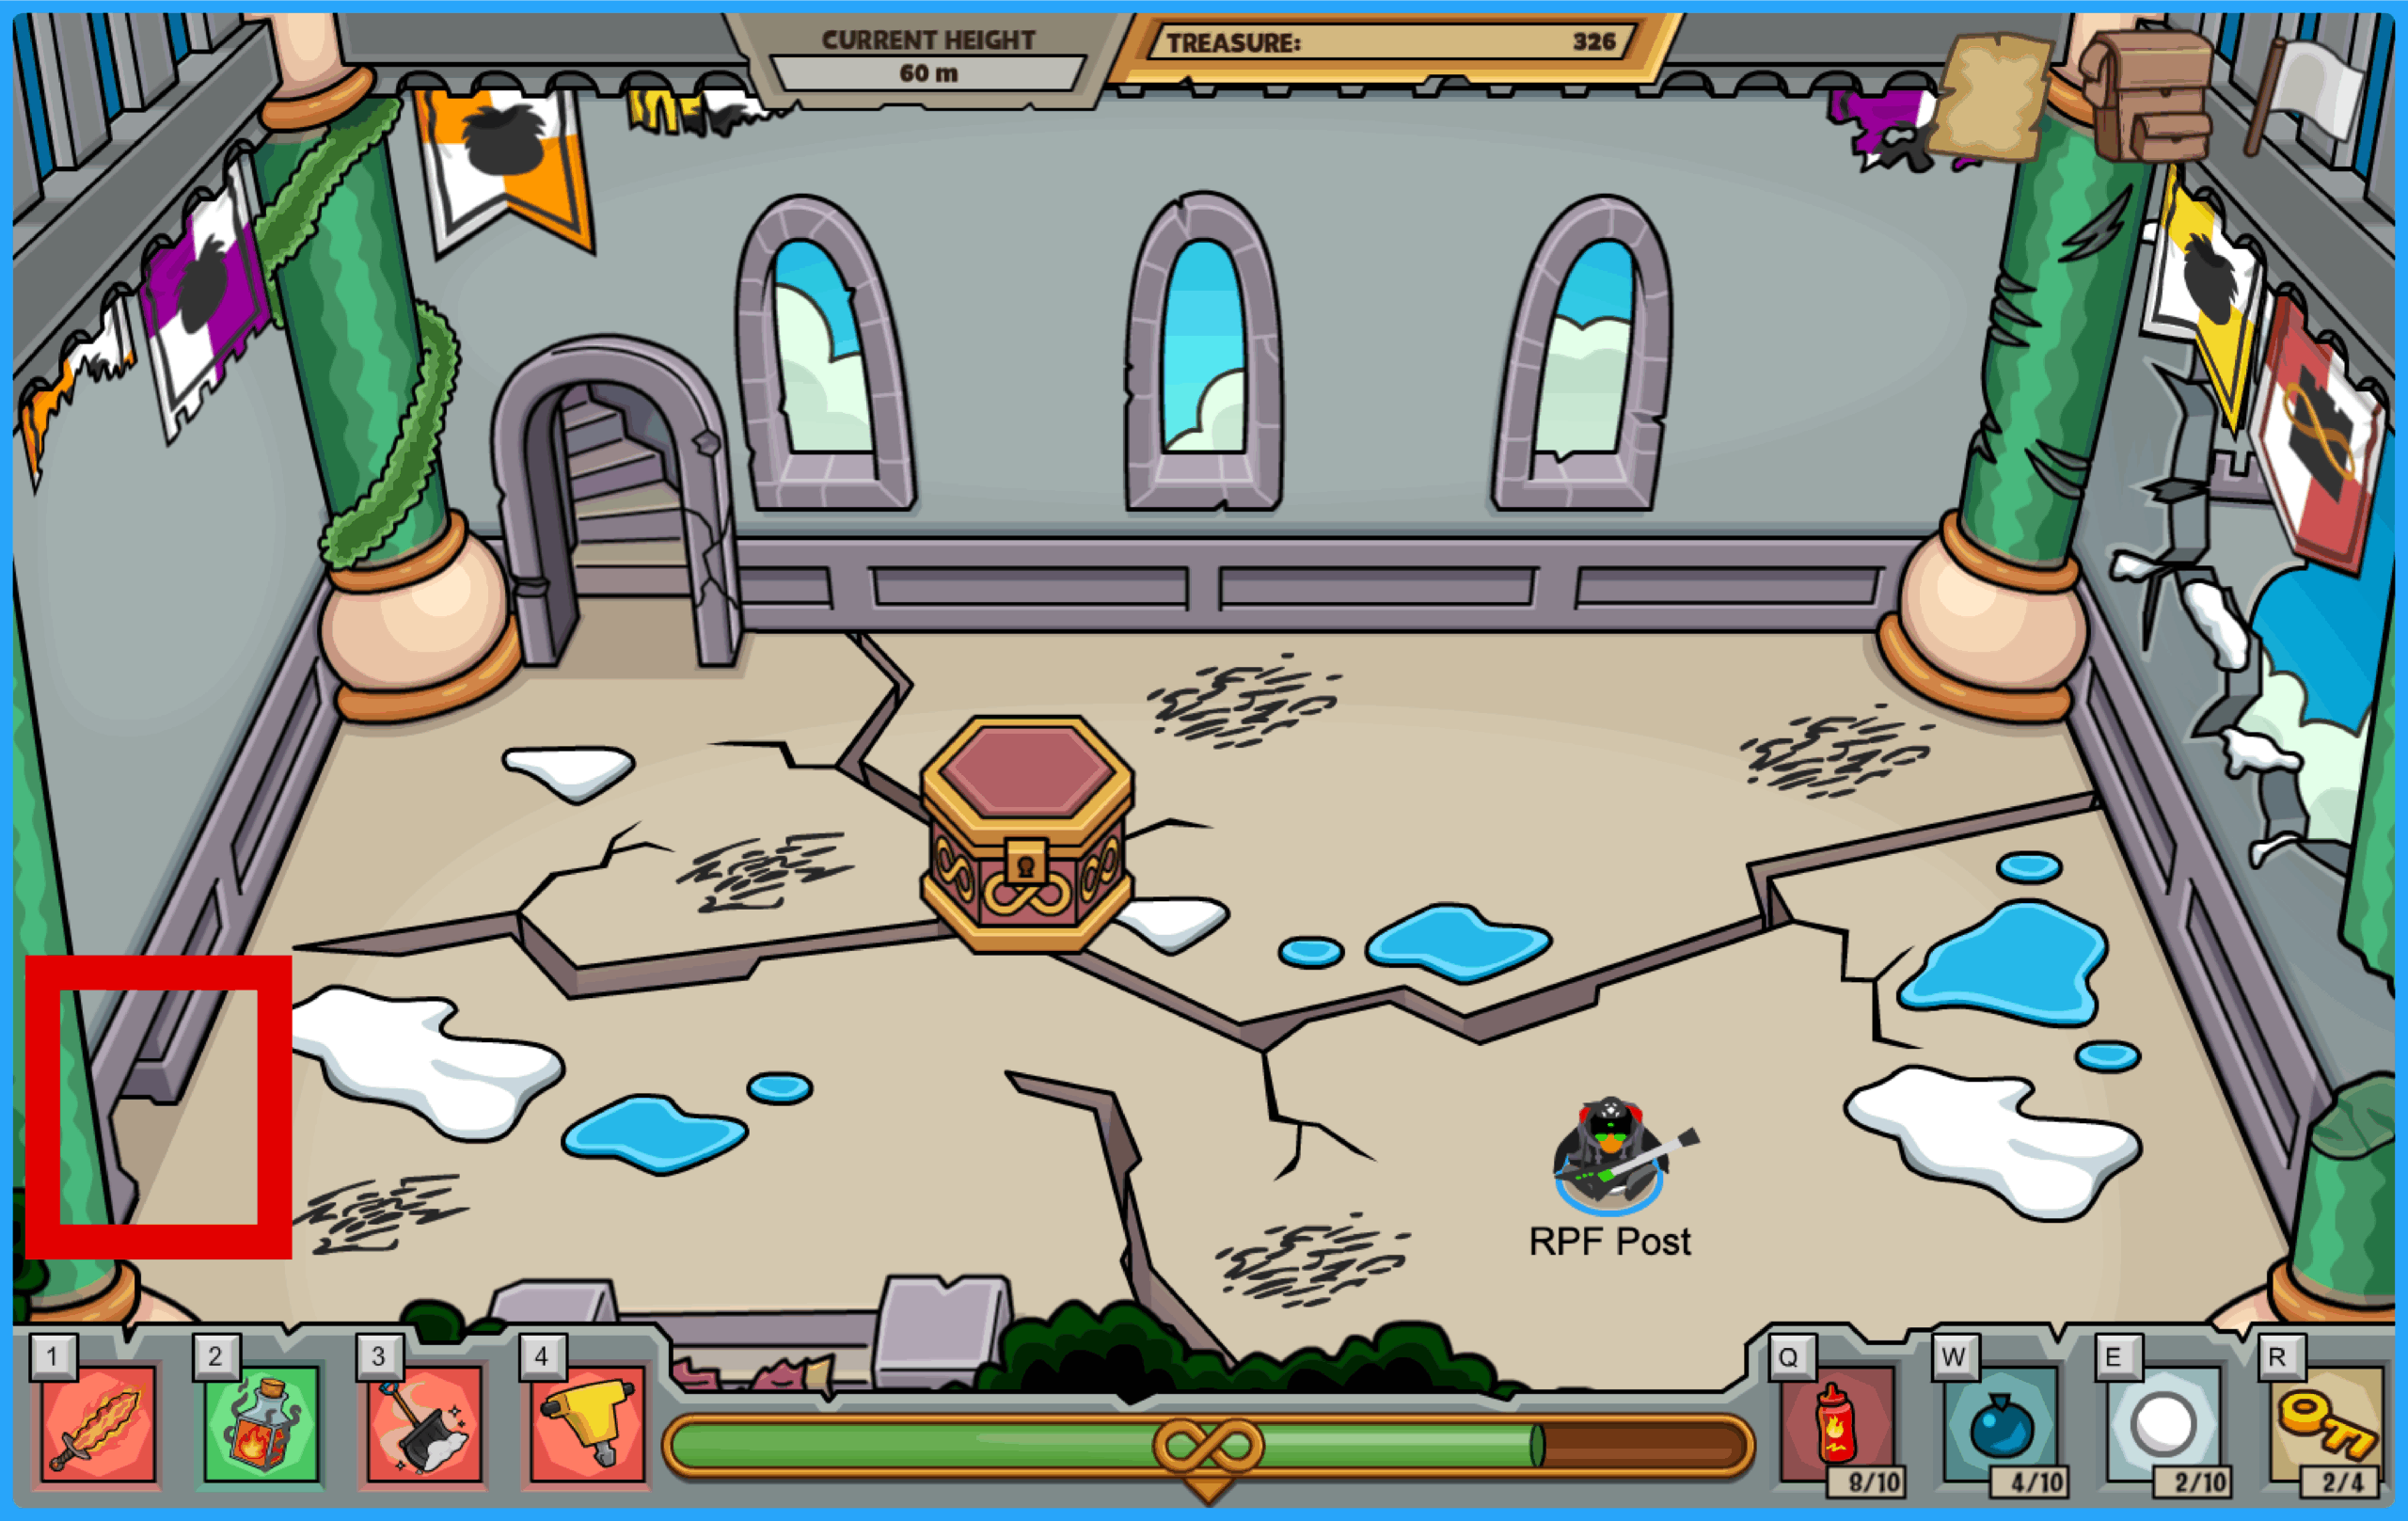
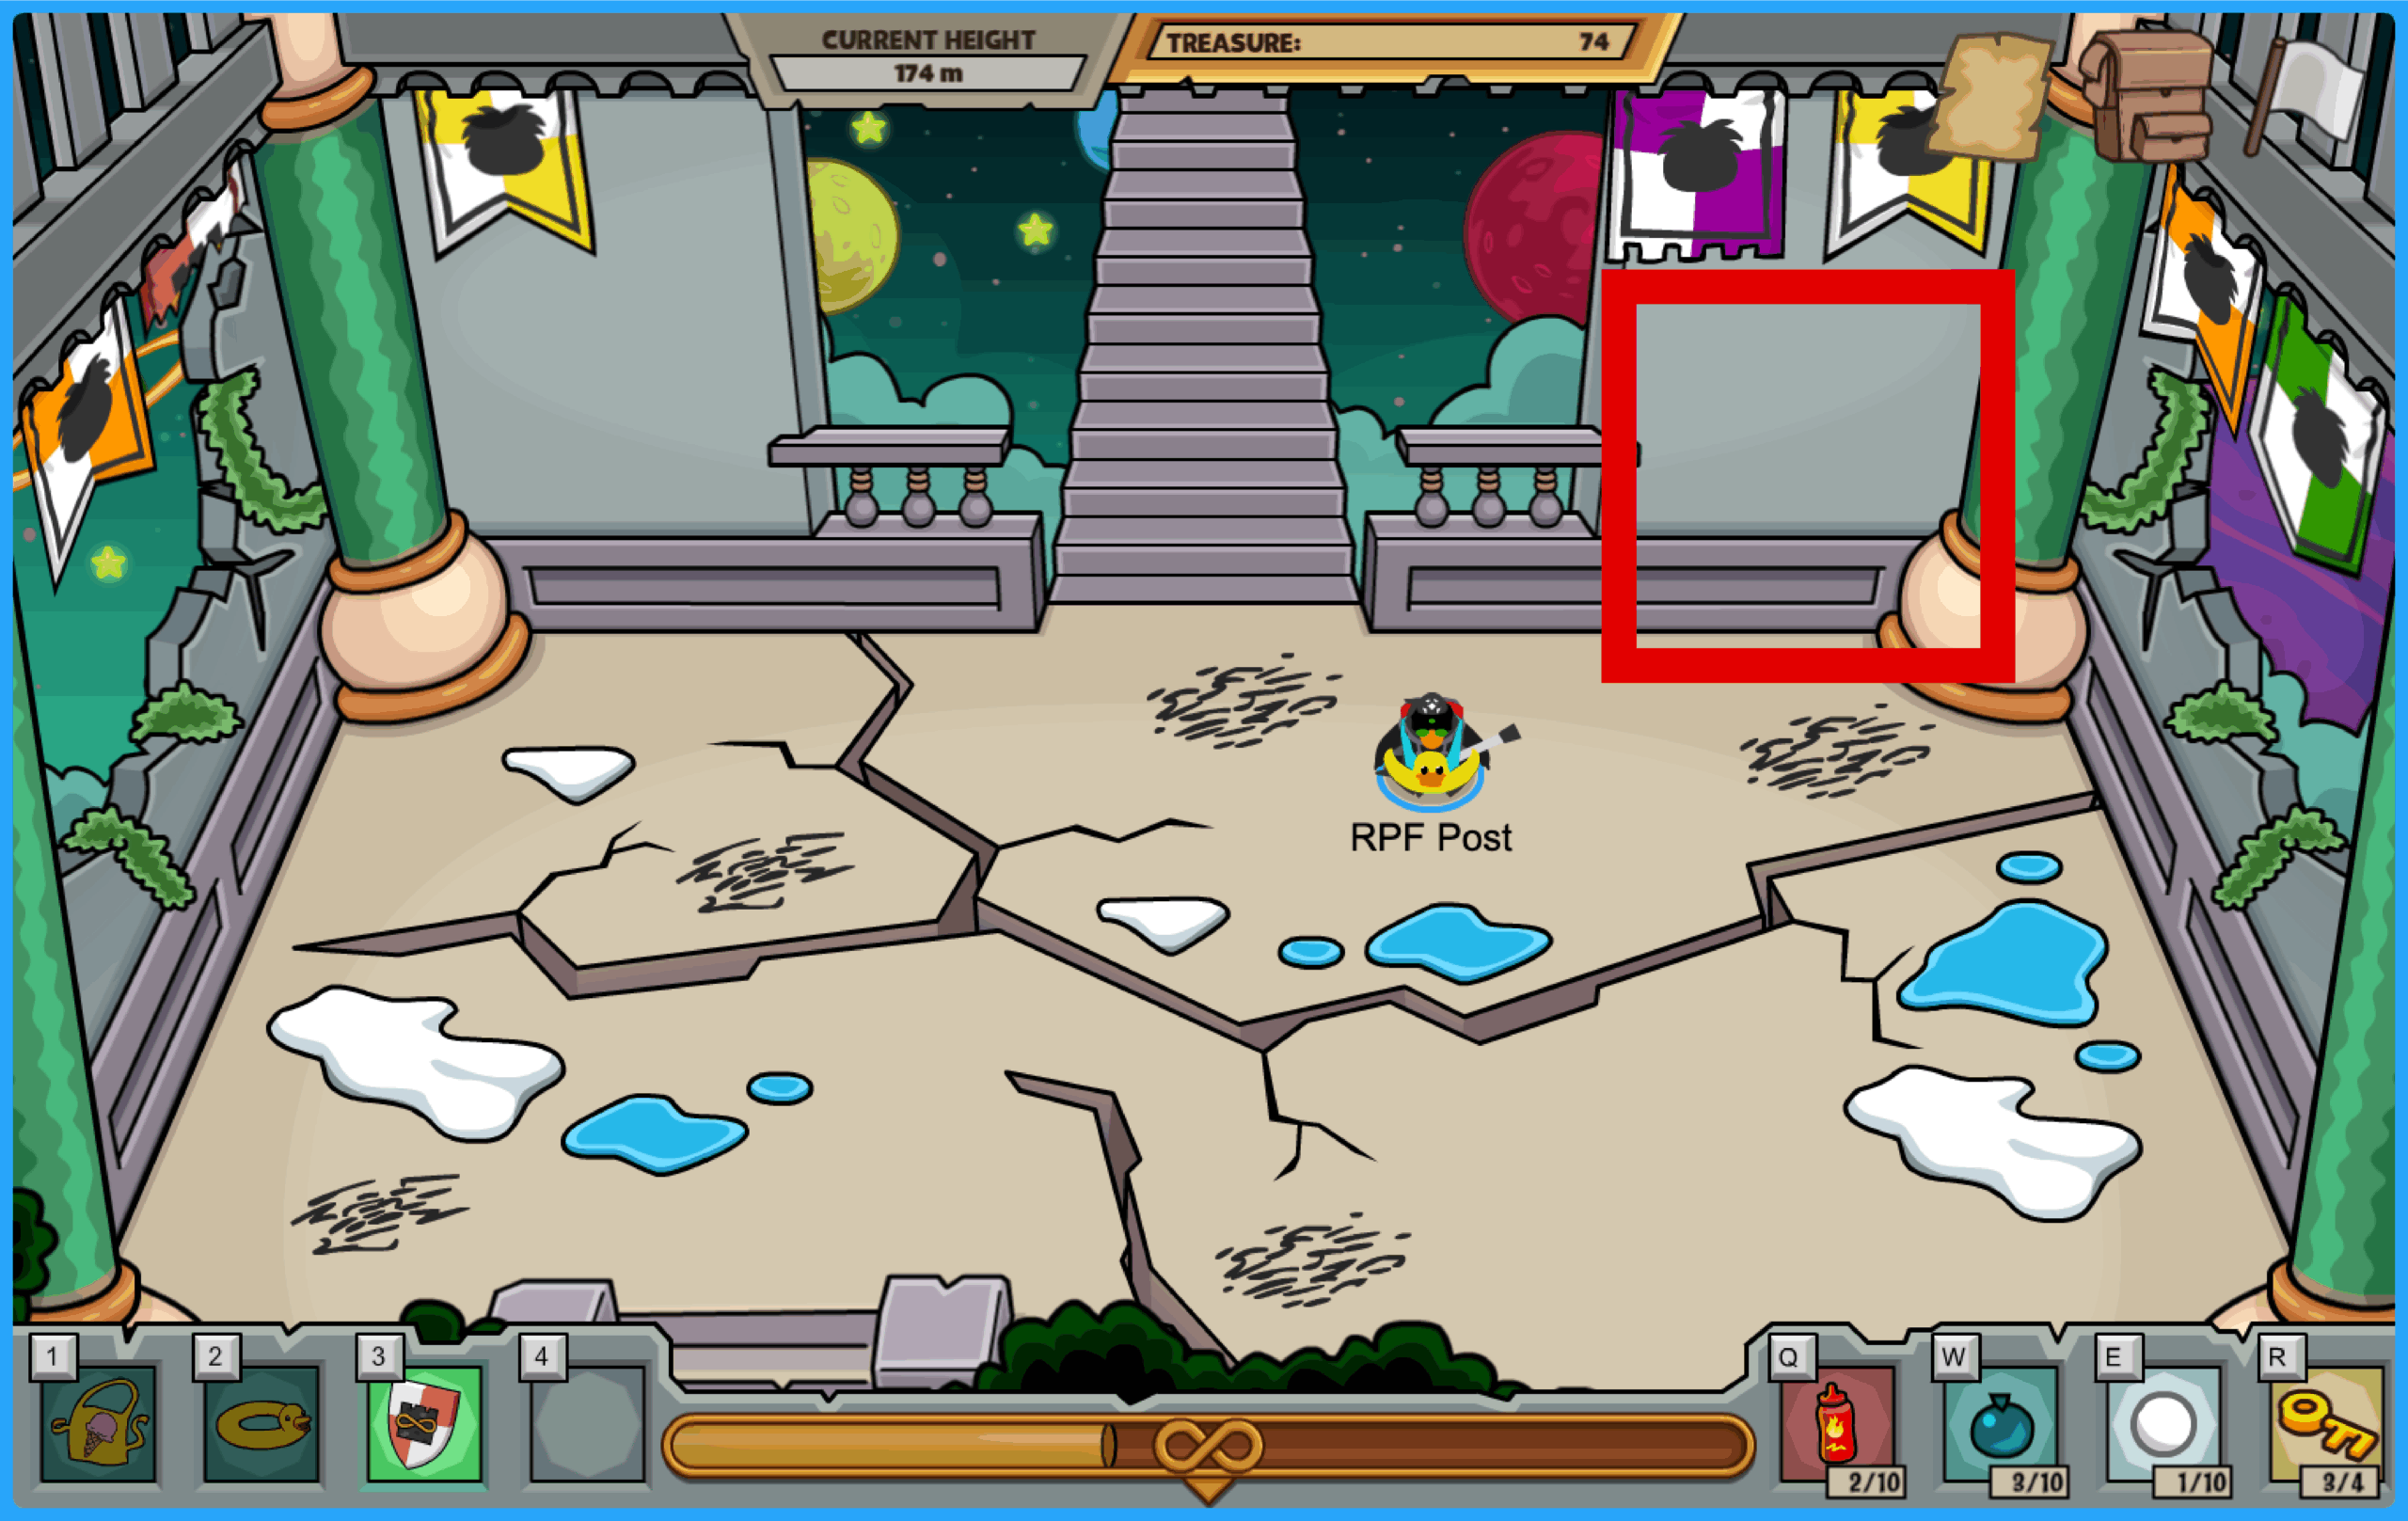
After the mirror breaks, you will want to exit the room up the stairs as normal. If the stairs are NOT LETTING YOU EXIT, walk along the walls until you find a secret or glitched exit. I’ve found that typically it will be in the upper right hand corner, circled below.

You will then be face to face with Garianna, and the boss battle will begin. There will be 3 waves of enemies that you need to take out to pass the first stage. Do not waste your items or health on attacking Garianna, as she cannot take damage yet. She will be hurling attacks at you, so make sure you are moving around a lot to best avoid taking any damage while you take out the 3 waves. The best strategy I have found is to go very heavy on the defense with Support Artifacts, as the more shields you have, the more likely you are to not take damage. I recommend wearing the Jetpack and Safety Vest.
After the 3 waves are defeated, Garianna will run up through the tower. Make sure to follow her – if the stairs are glitched do the same as before and walk along the walls until you find a secret entrance. Once again, I’ve found the upper right hand corner is usually where it is.
Now you will have to chase Garianna through 4 outdoor tower floors. If you don’t have shields or if you run low on shields, do your best to avoid all of the hazards to keep maximum health.

After running through 4 floors, the next room will be the final stage of the battle where you must defeat Garianna. She will be flying back and forth so make sure to place your elemental throws ahead of where she is so she’ll fly into it. Once in a while she will land, and this is the easiest opportunity to get in some good strikes. Avoid all of her attacks and run her health bar to 0 to defeat her! Once defeated, she will drop down a ladder and say she is headed to the top of the tower.

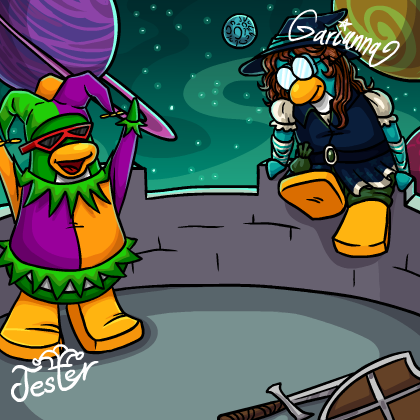
Follow her up the ladder and a cutscene will begin. This concludes the boss battle, congrats on your triumph!

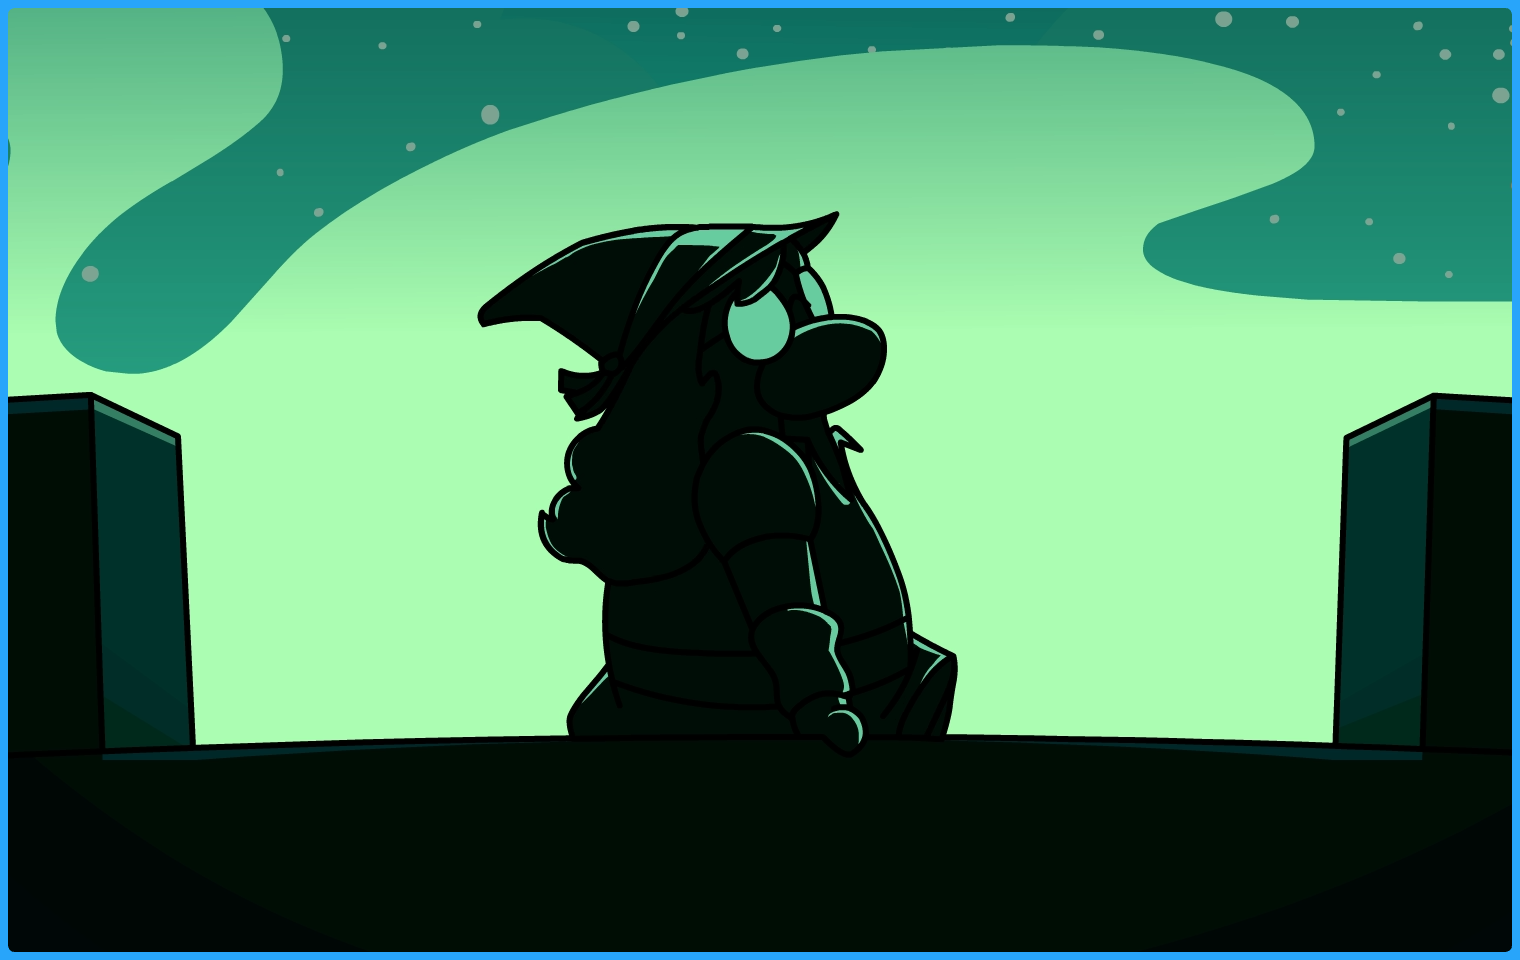
Right now for most people the cutscene currently freezes on the last frame, as seen below. DO NOT leave this page while the cut scene is frozen, it is a very common glitch. Wait on the page, it might even take a few minutes, but then you will be transported to the Snow Forts and Garianna and the Jester’s Giveaway background will have been added to your inventory!


Each time you play the Infinite Tower, you will gain an unspecified amount of experience. Whenever a new experience level is met, you will get an Infinite Tower themed clothing item! They will automatically be added to your inventory after leaving or dying during an Infinite Tower run where the experience level is met. After collecting them all, put on the Cloud Striders, Pillars’ Heart Guard, Sky Mantle, Watchtower Helm, and Wind Fists and press “D” to do the new special dance move.
That’s a wrap on our complete Infinite Tower Guide for Club Penguin Journey! We hope this guide has provided you with an infinite amount of fun, and pointed you in the right directions so you can climb to your hearts content!
The Club Penguin News Team covers all CPJourney and CPLegacy party guides, quest guides, mascot trackers, game updates, and more. Join our Discord to see it all!
![]()
Lehky | General